
1. Go to cloudflare.com and log in.
2. If prompted select your account.
3. On the right side click on Add new site.
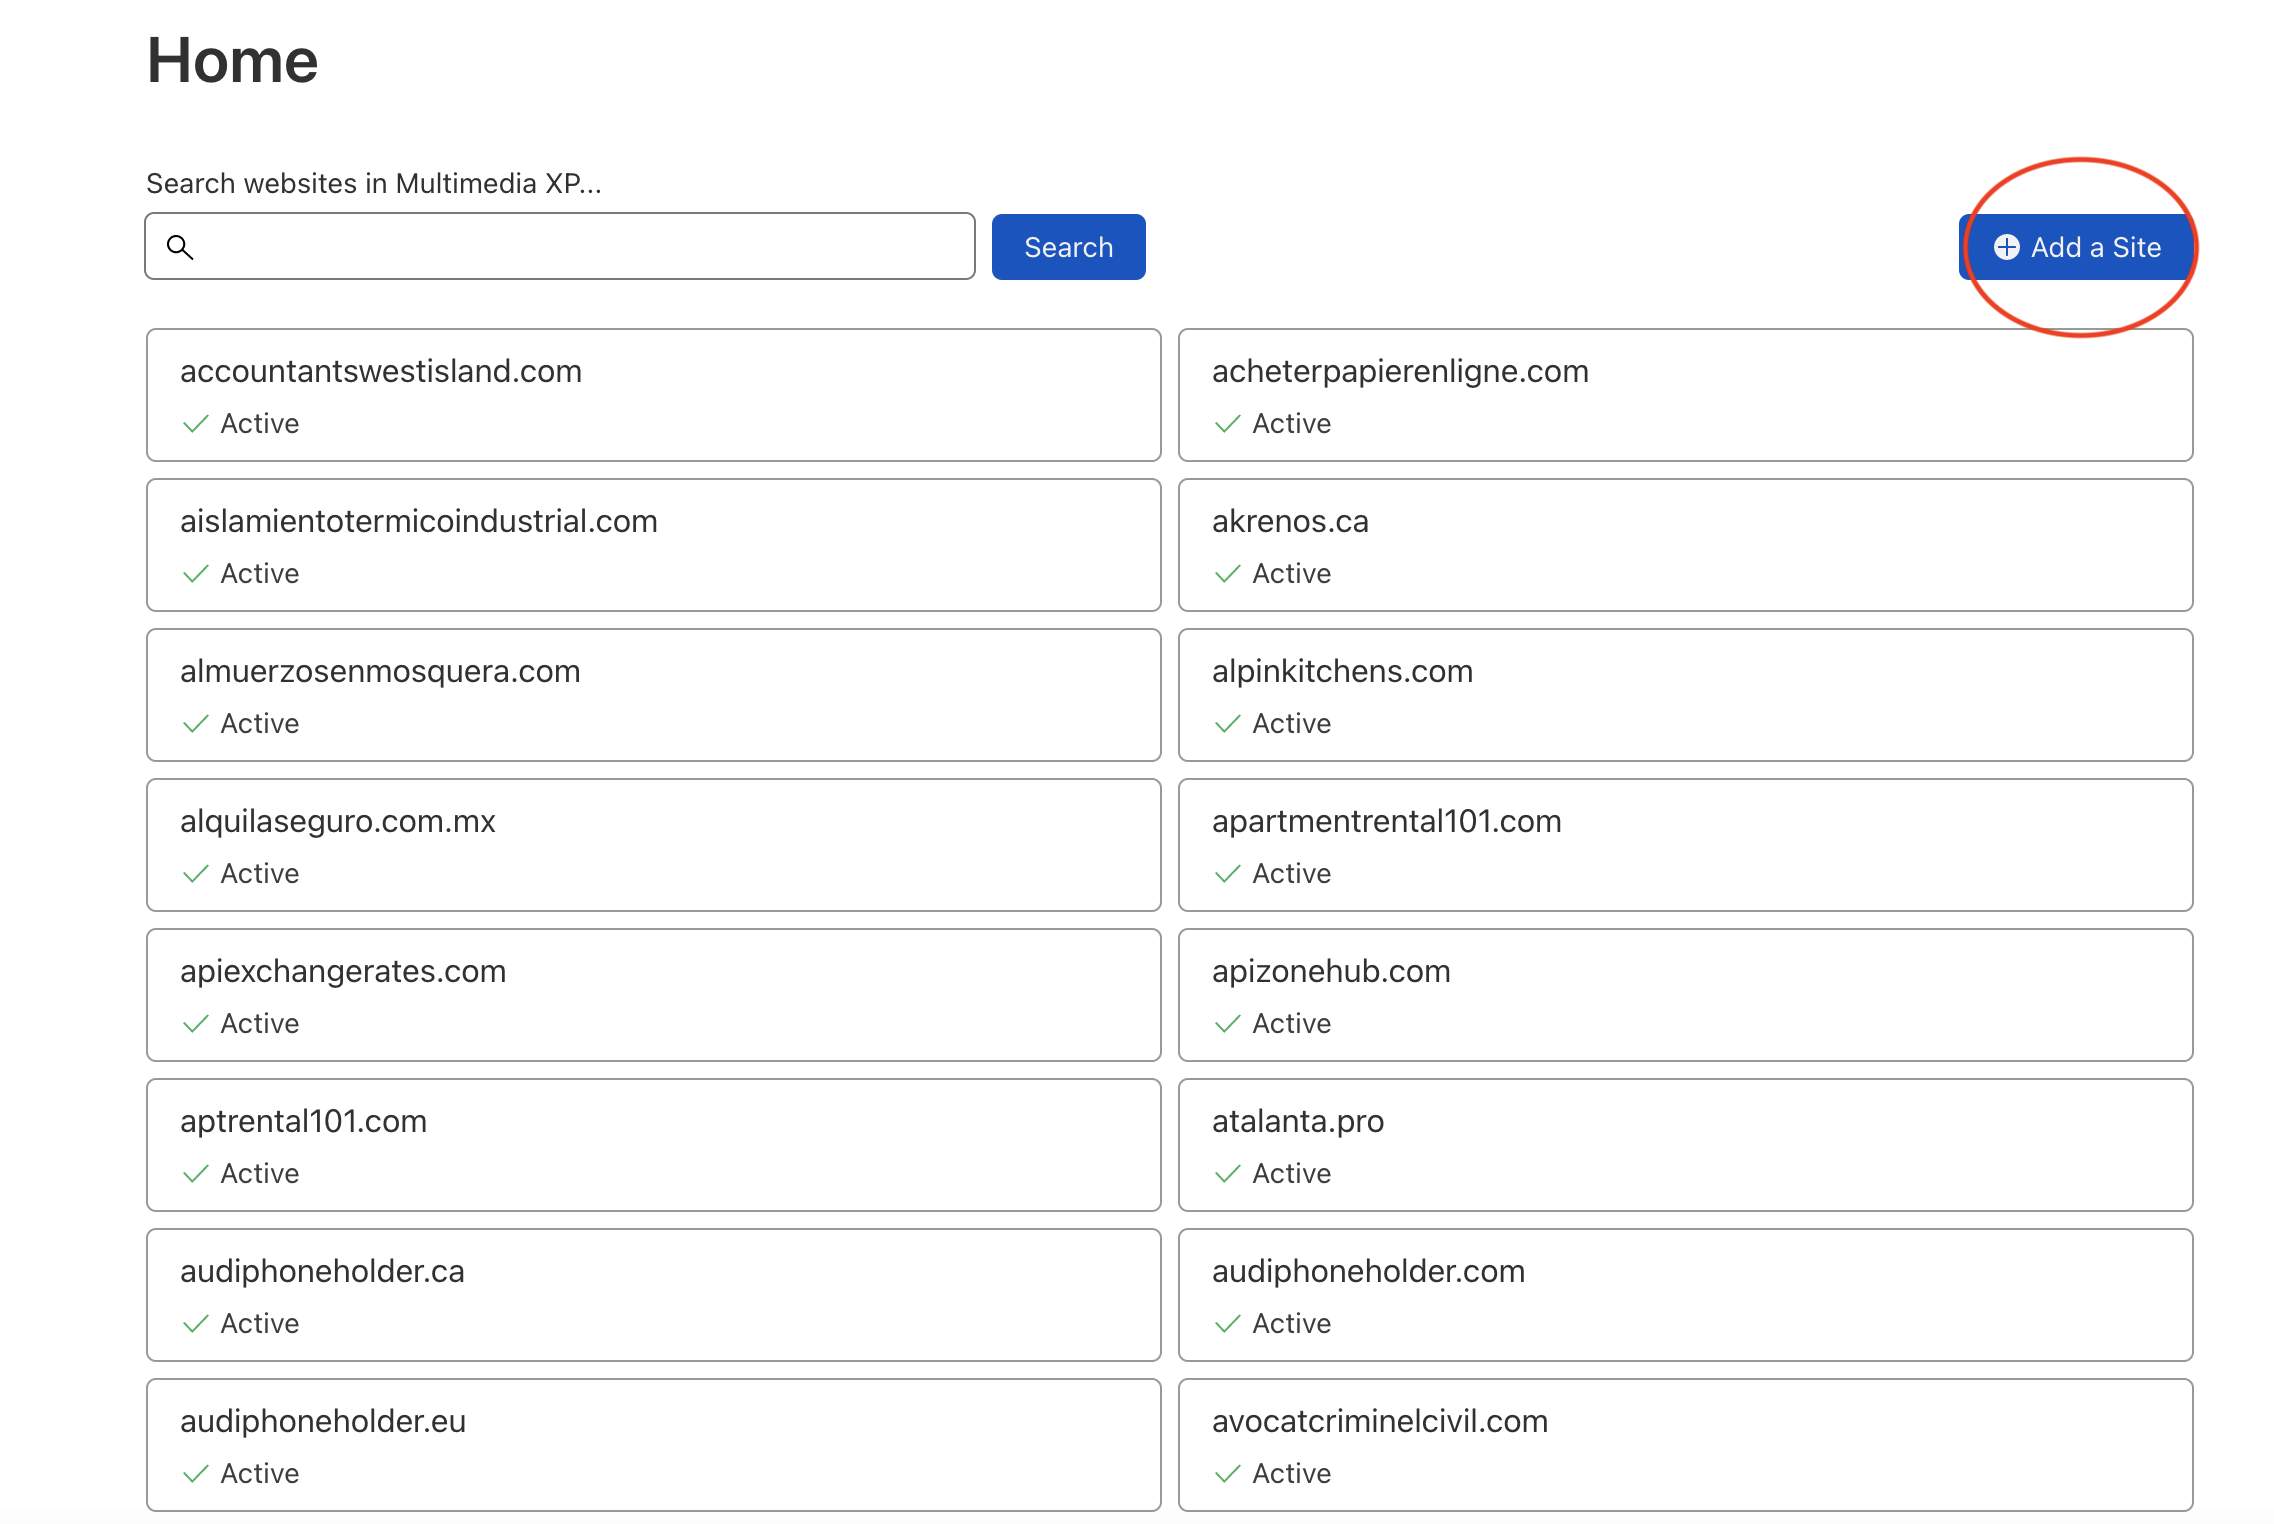
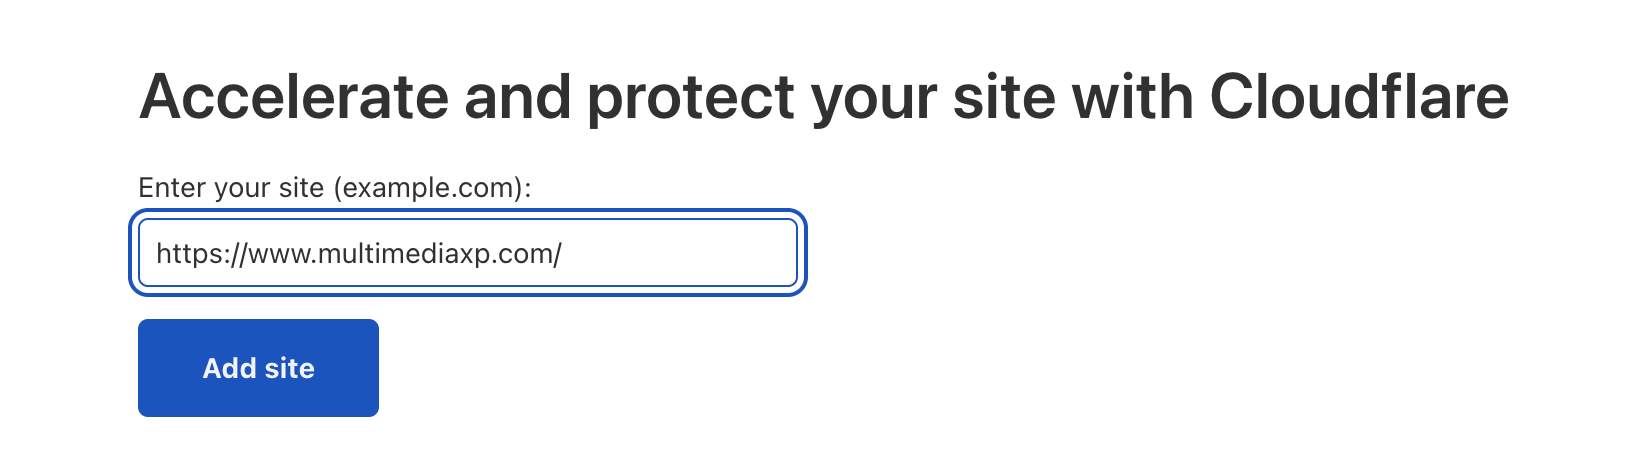
4. Enter your domain and click on Add site.
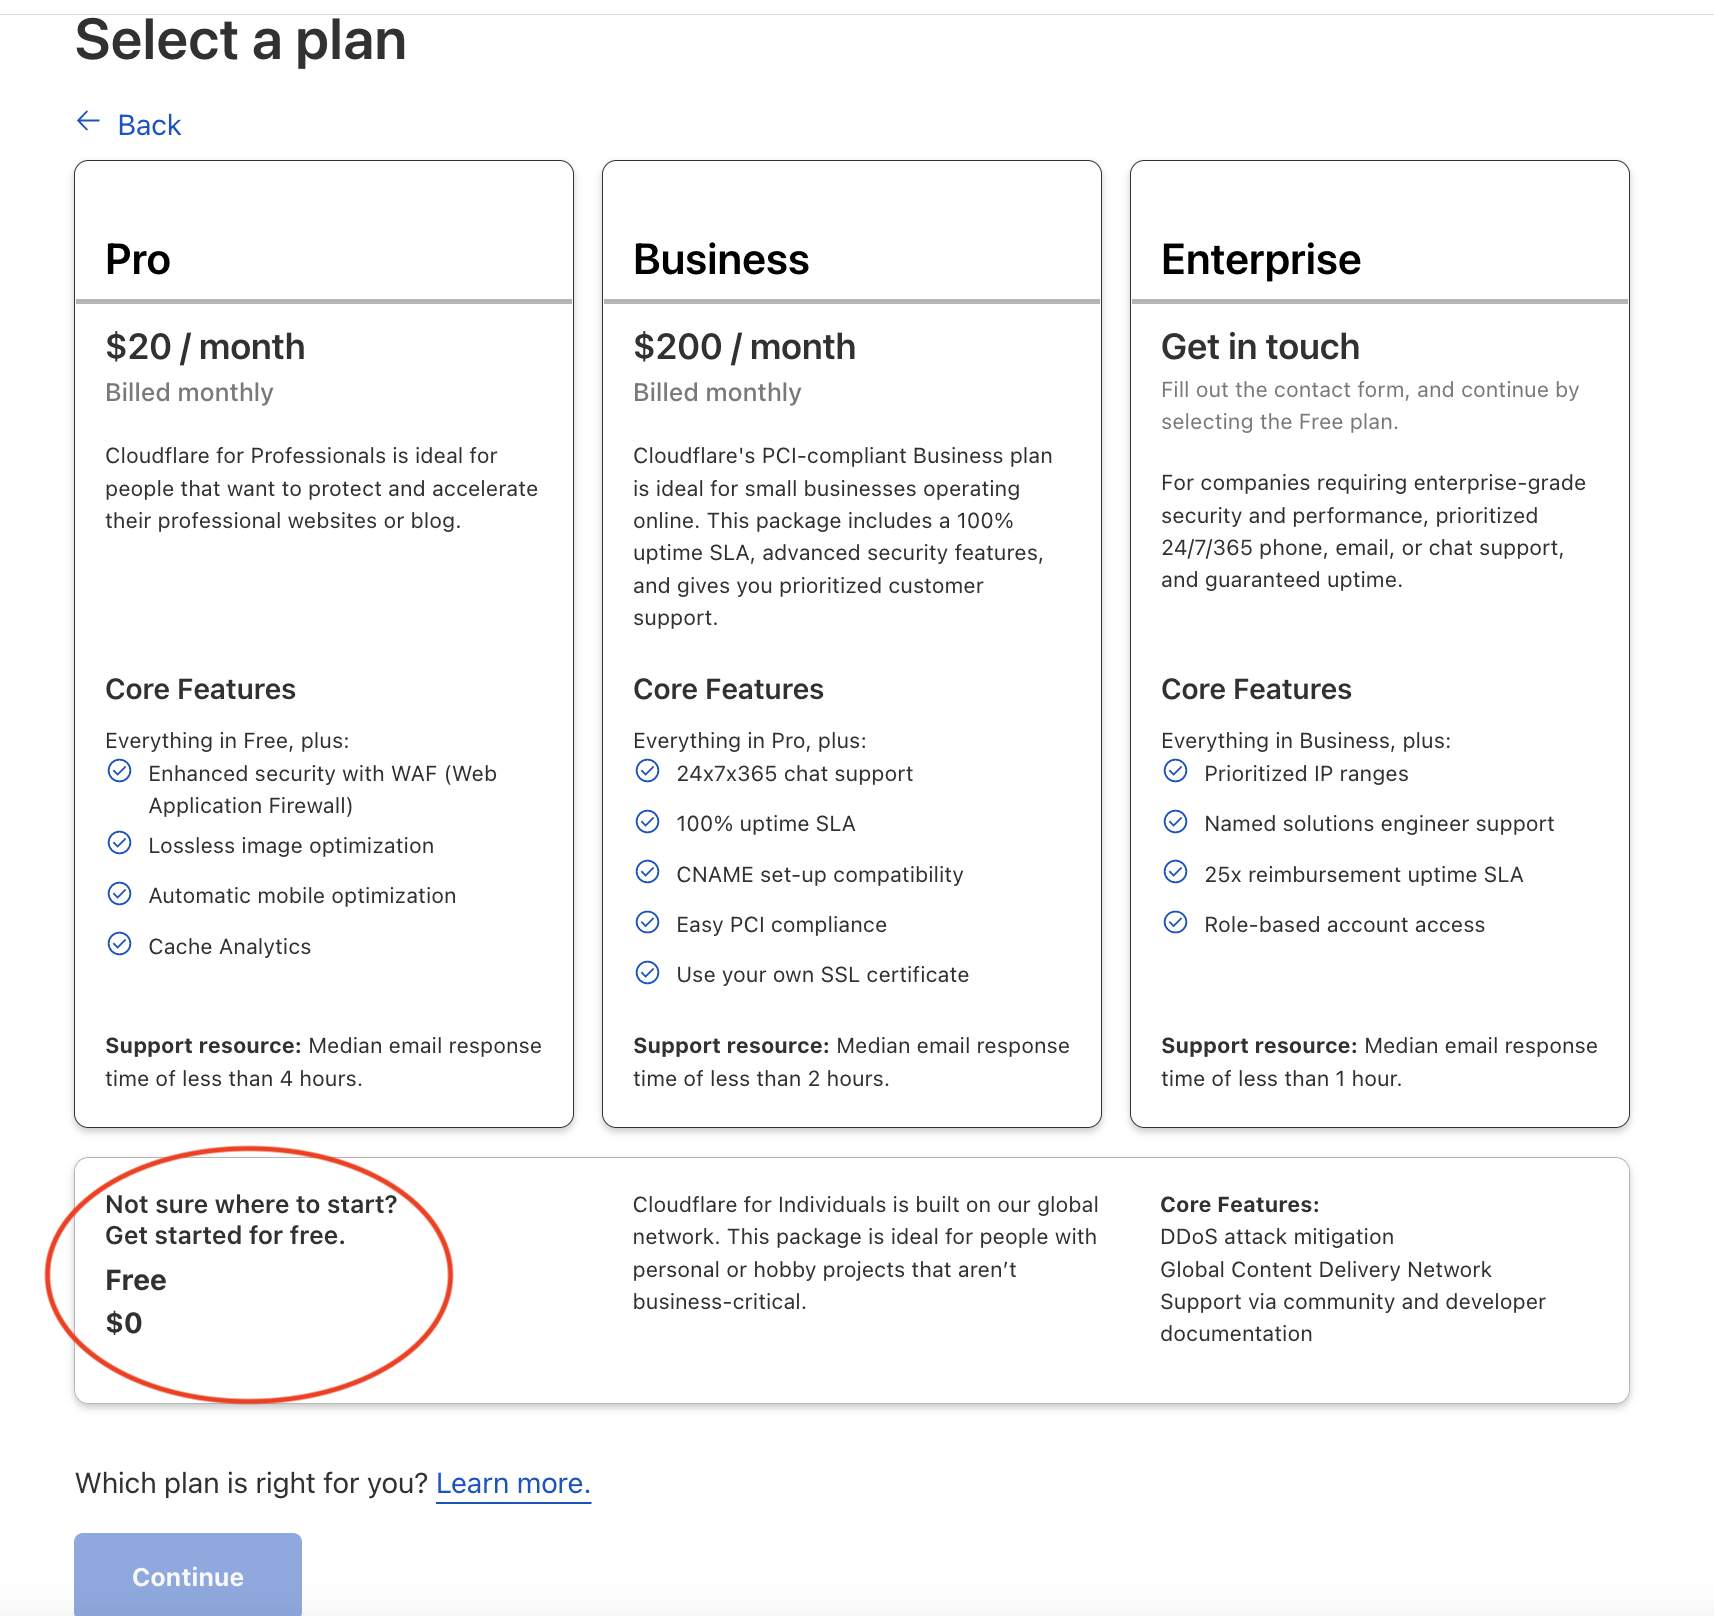
5. Select the Free option and click on continue.
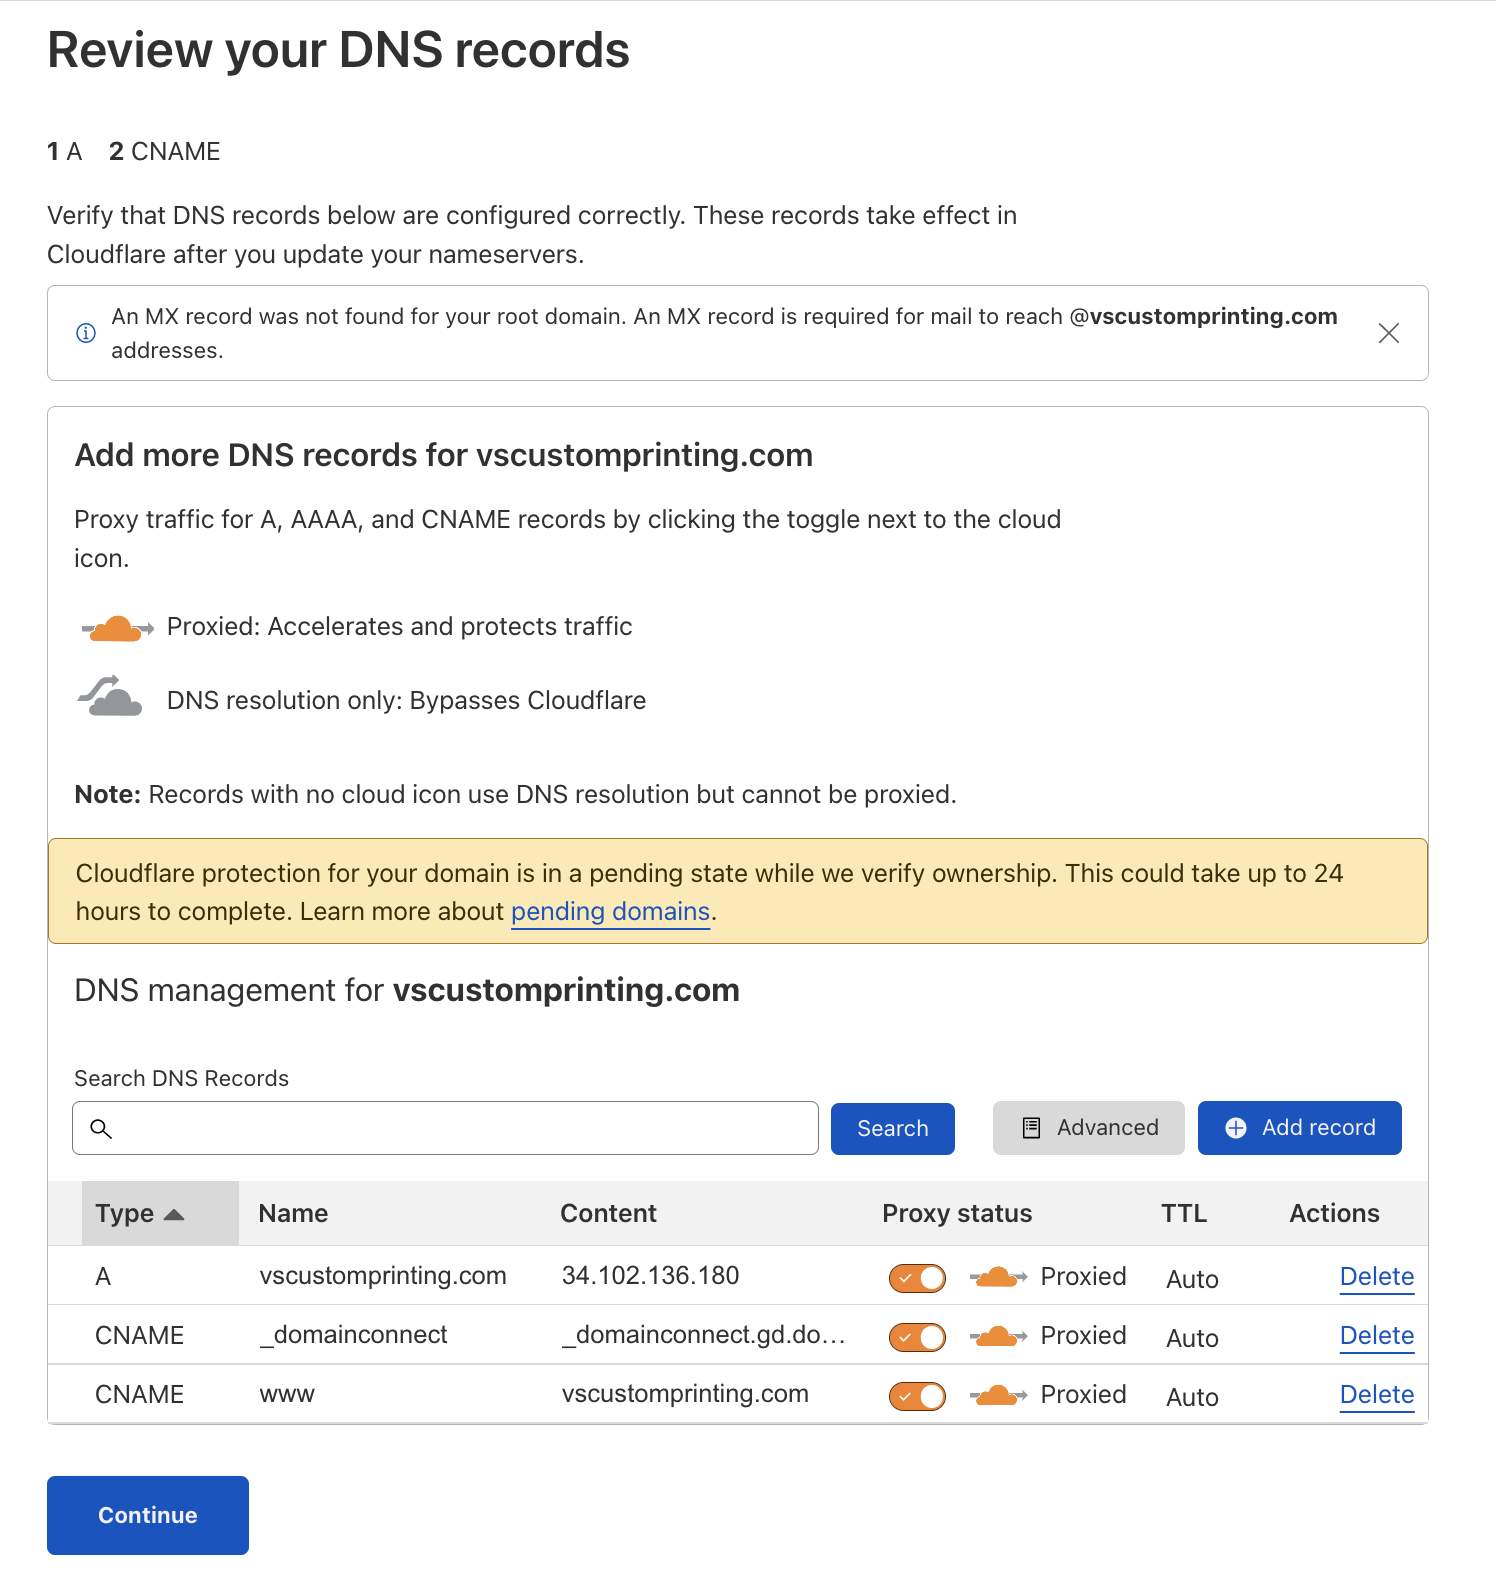
6. Set the right records to point hosting and mailservers to the right server and click on continue.
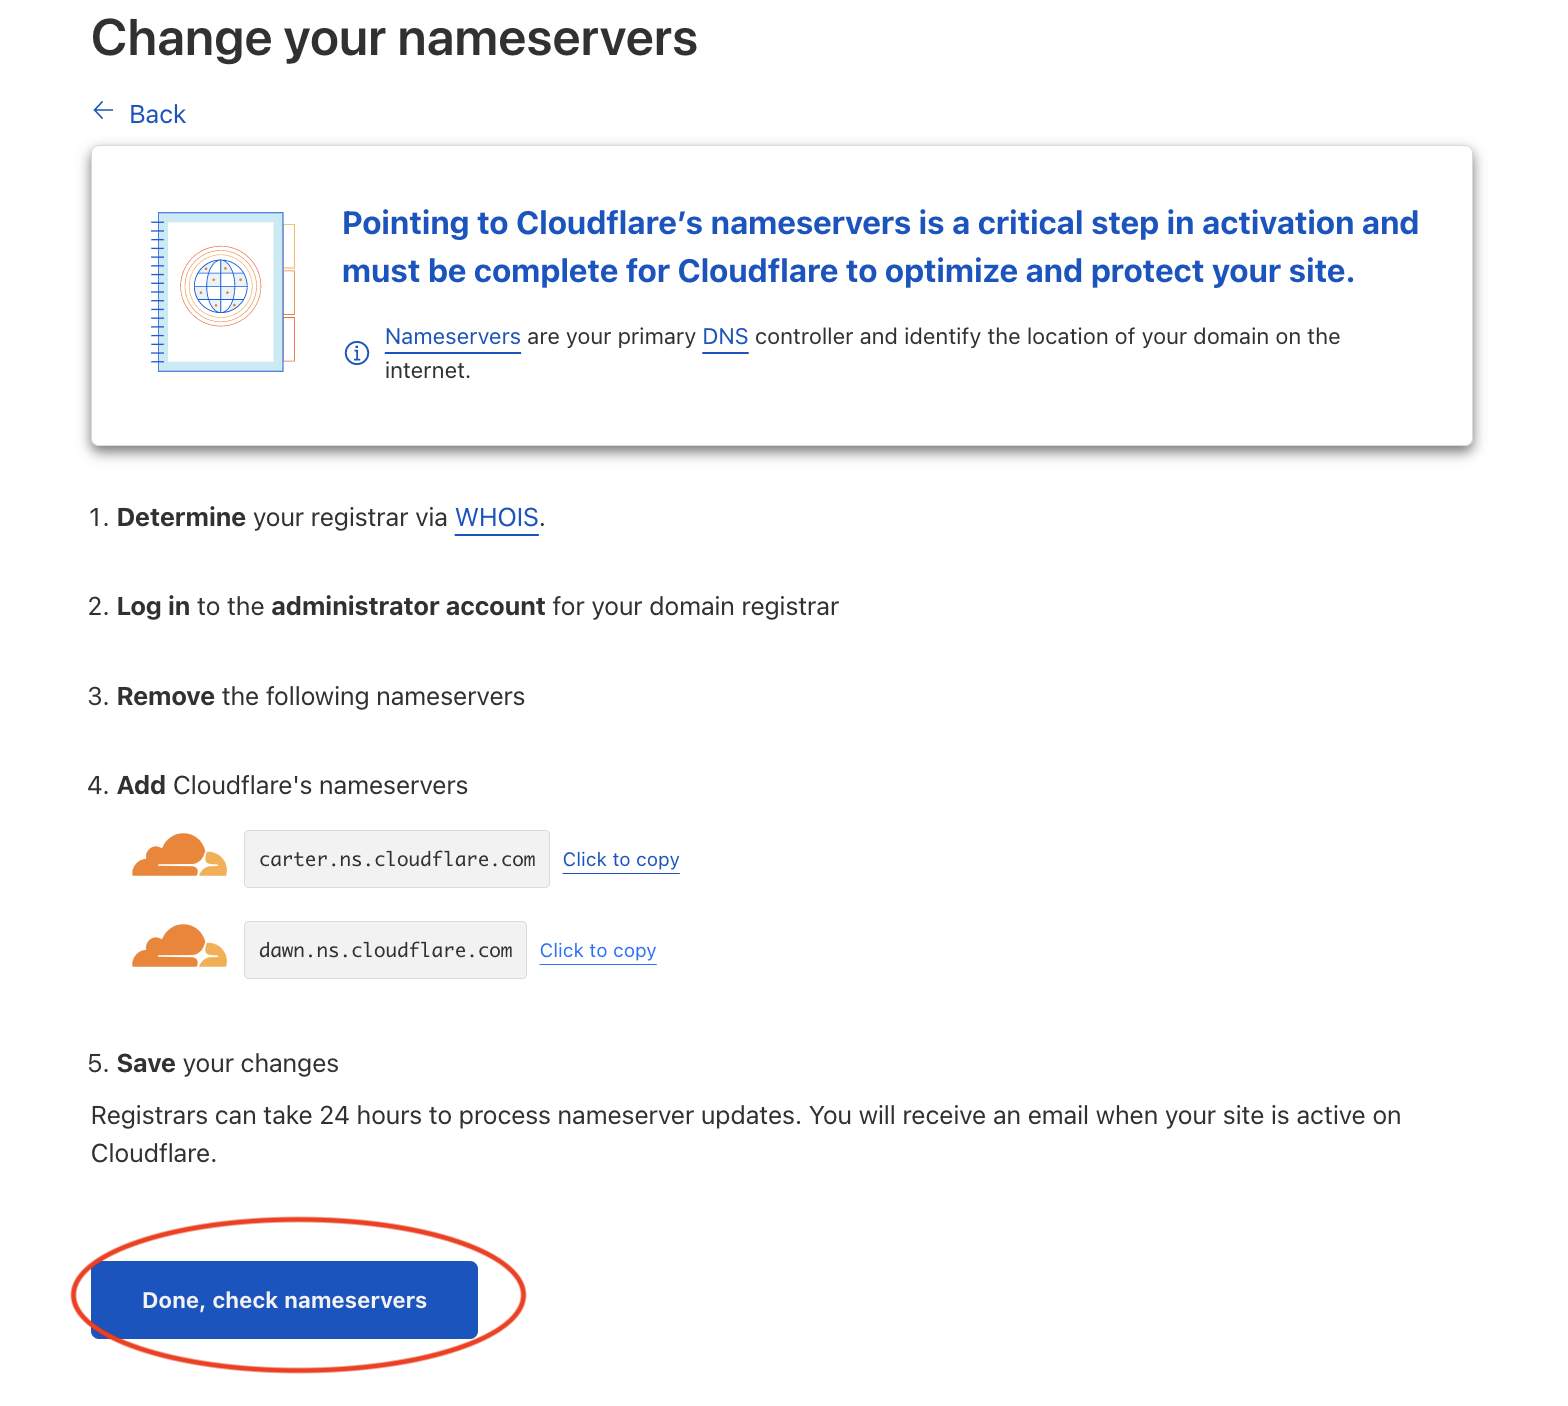
7. Copy the nameservers.

8. Now go to godaddy.com and log in.
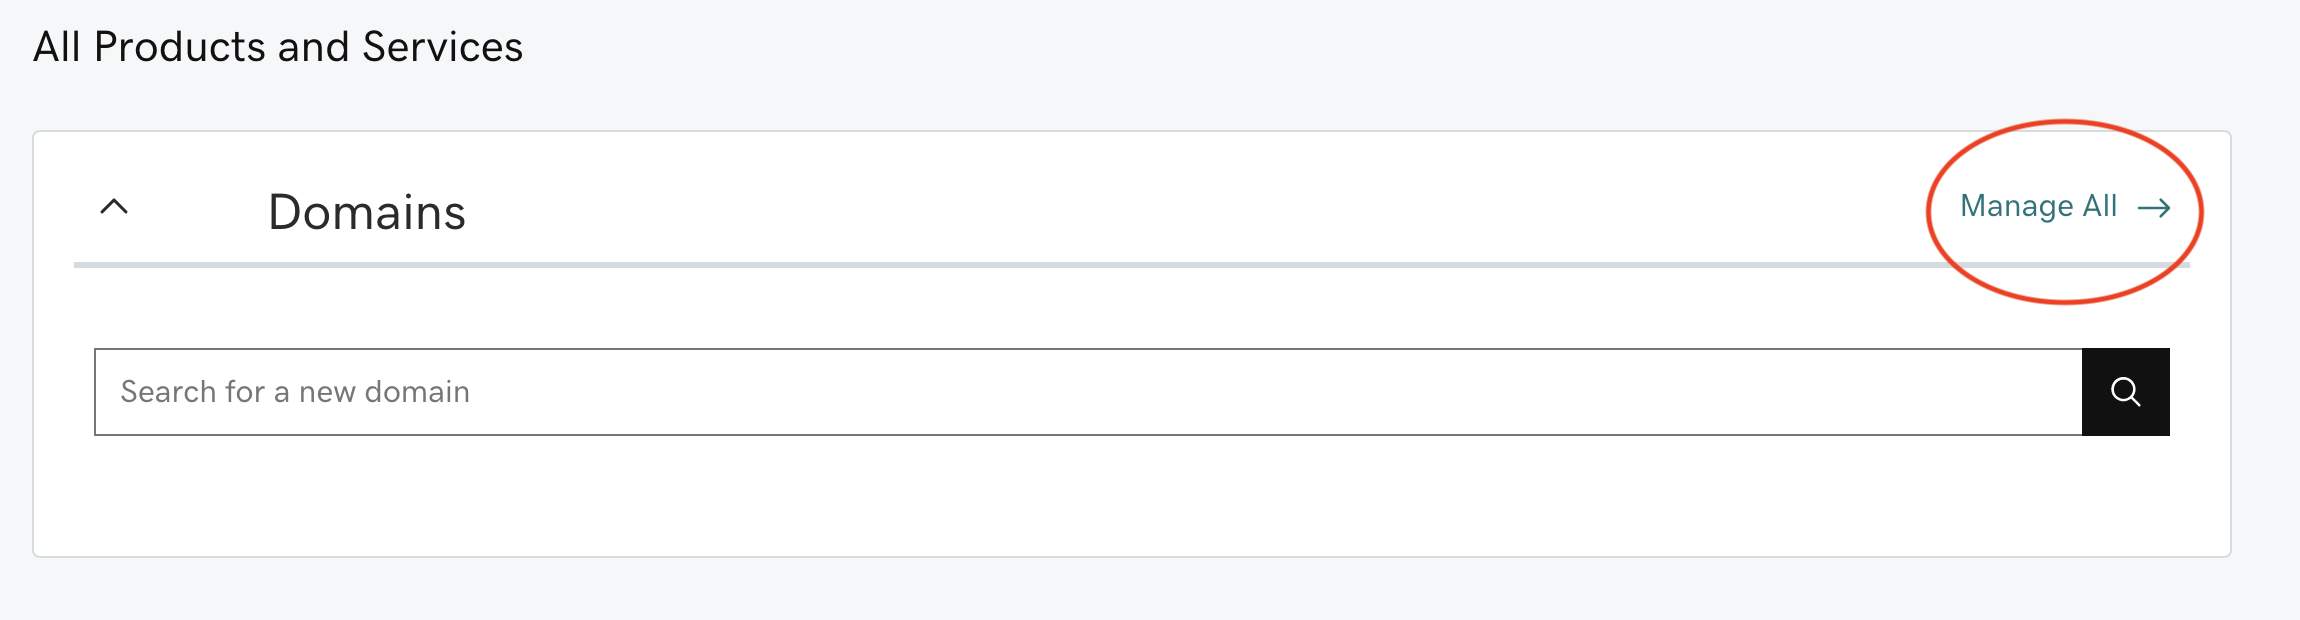
9. In the Domains section click on Manage all.
10. Click on Manage DNS.
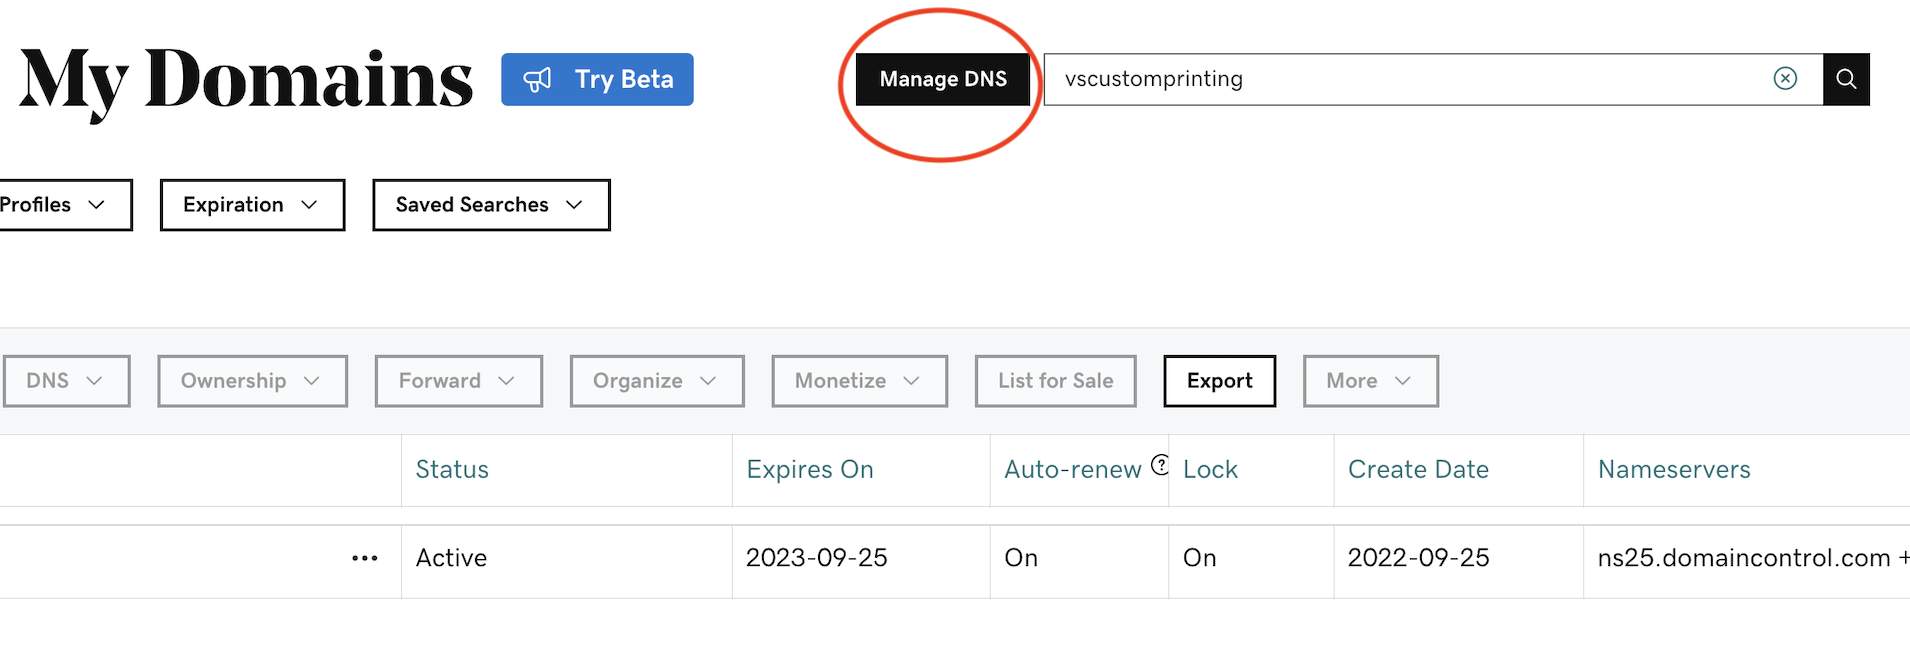
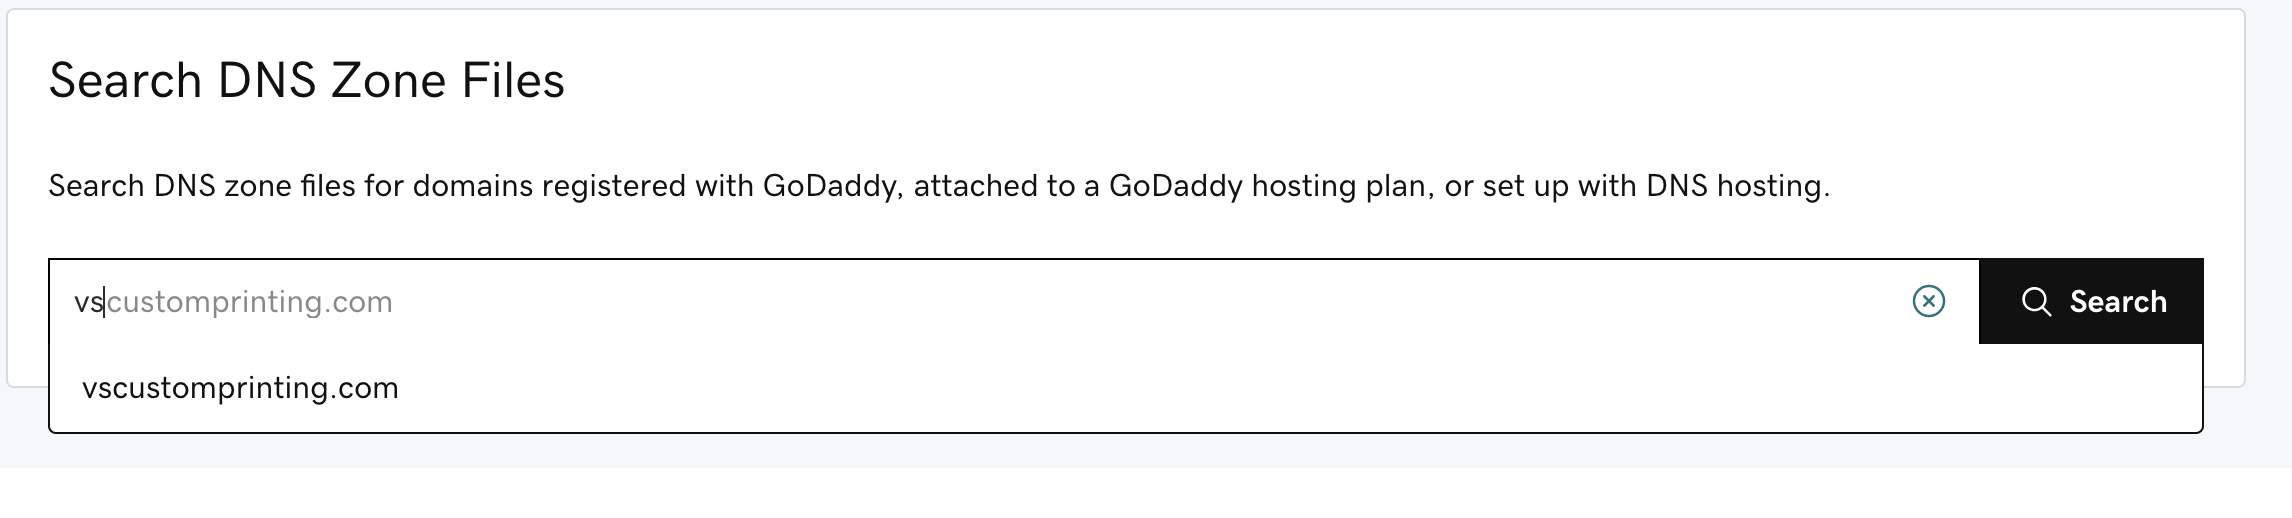
11. Enter your domain and click on the search icon.
12. Scroll down and in the Nameservers section click on change.
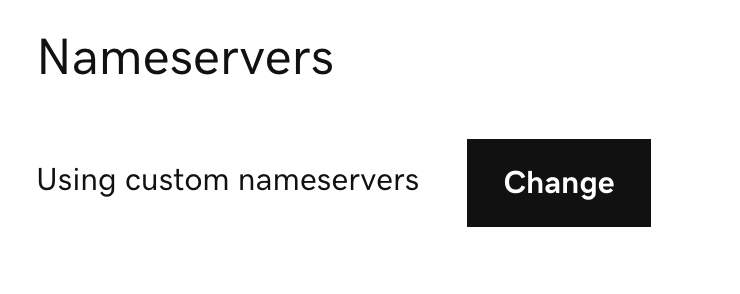
13. Click on Enter my own nameservers.
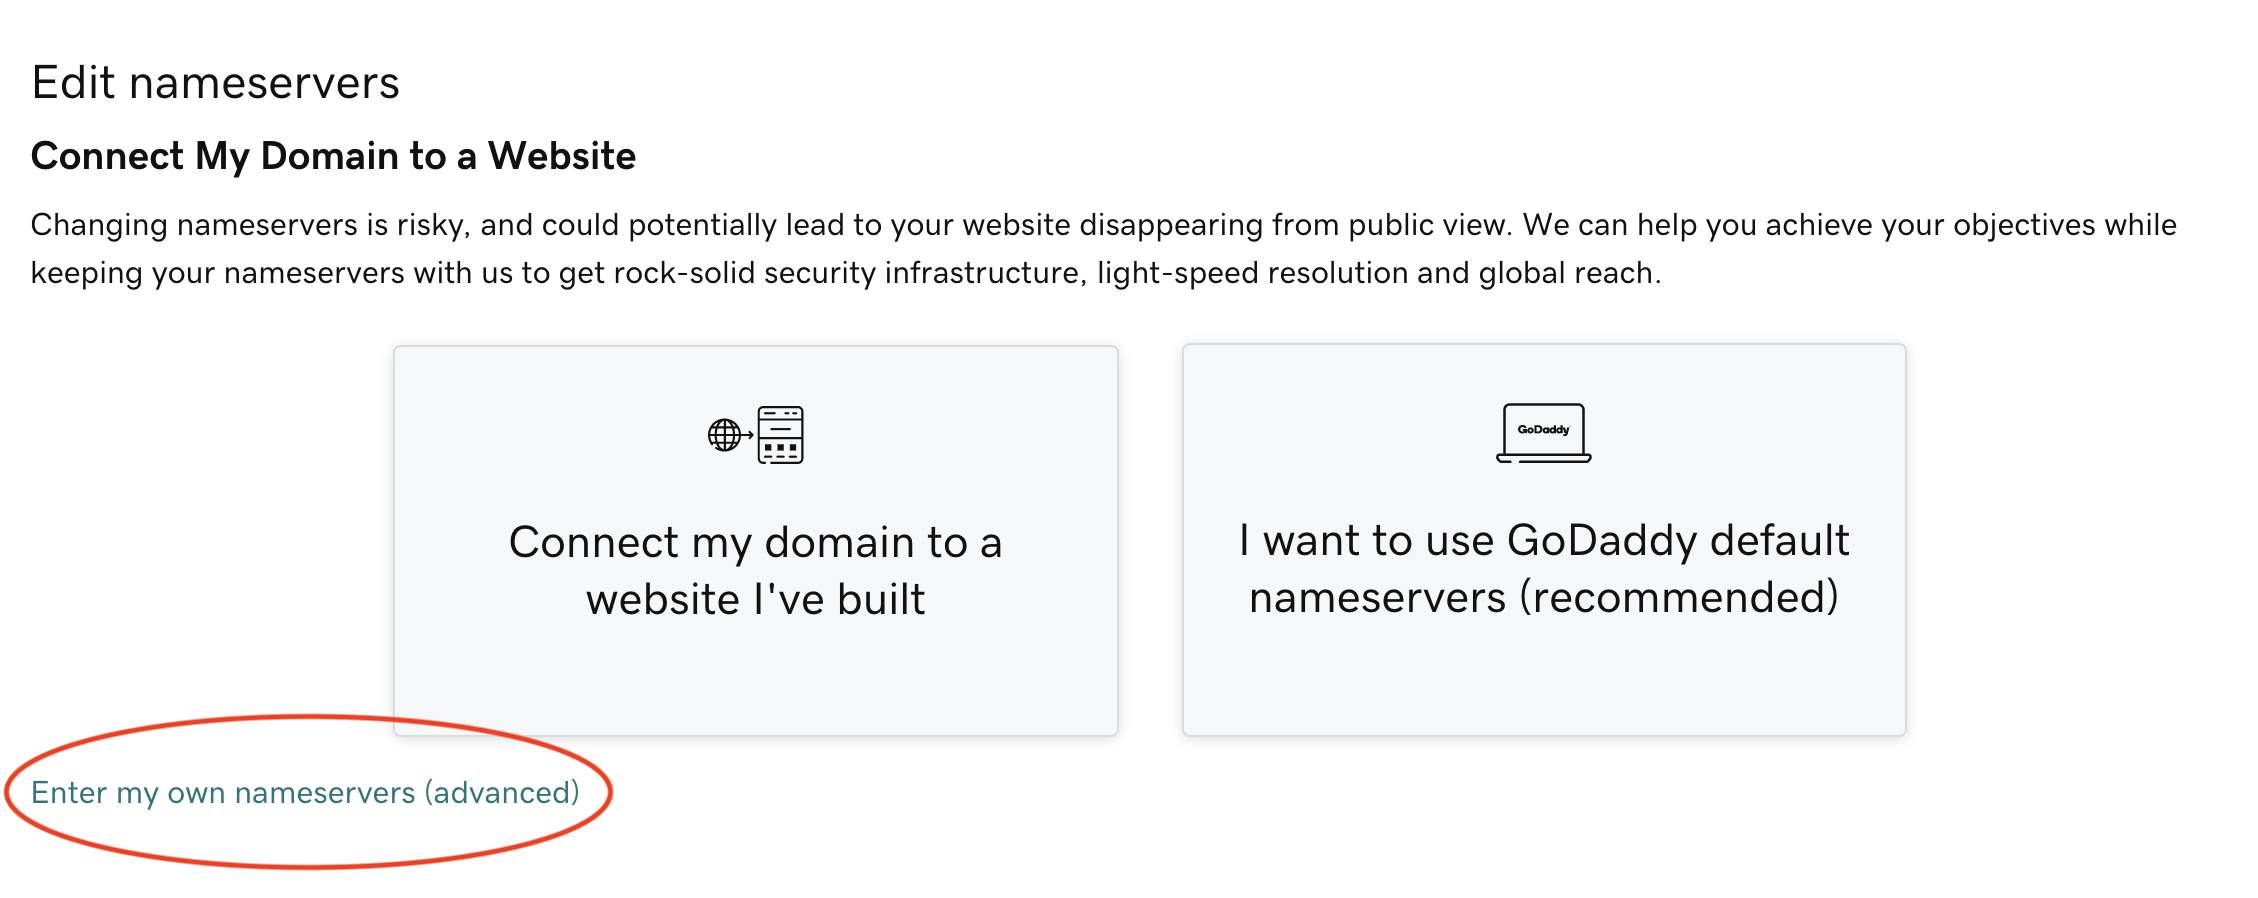
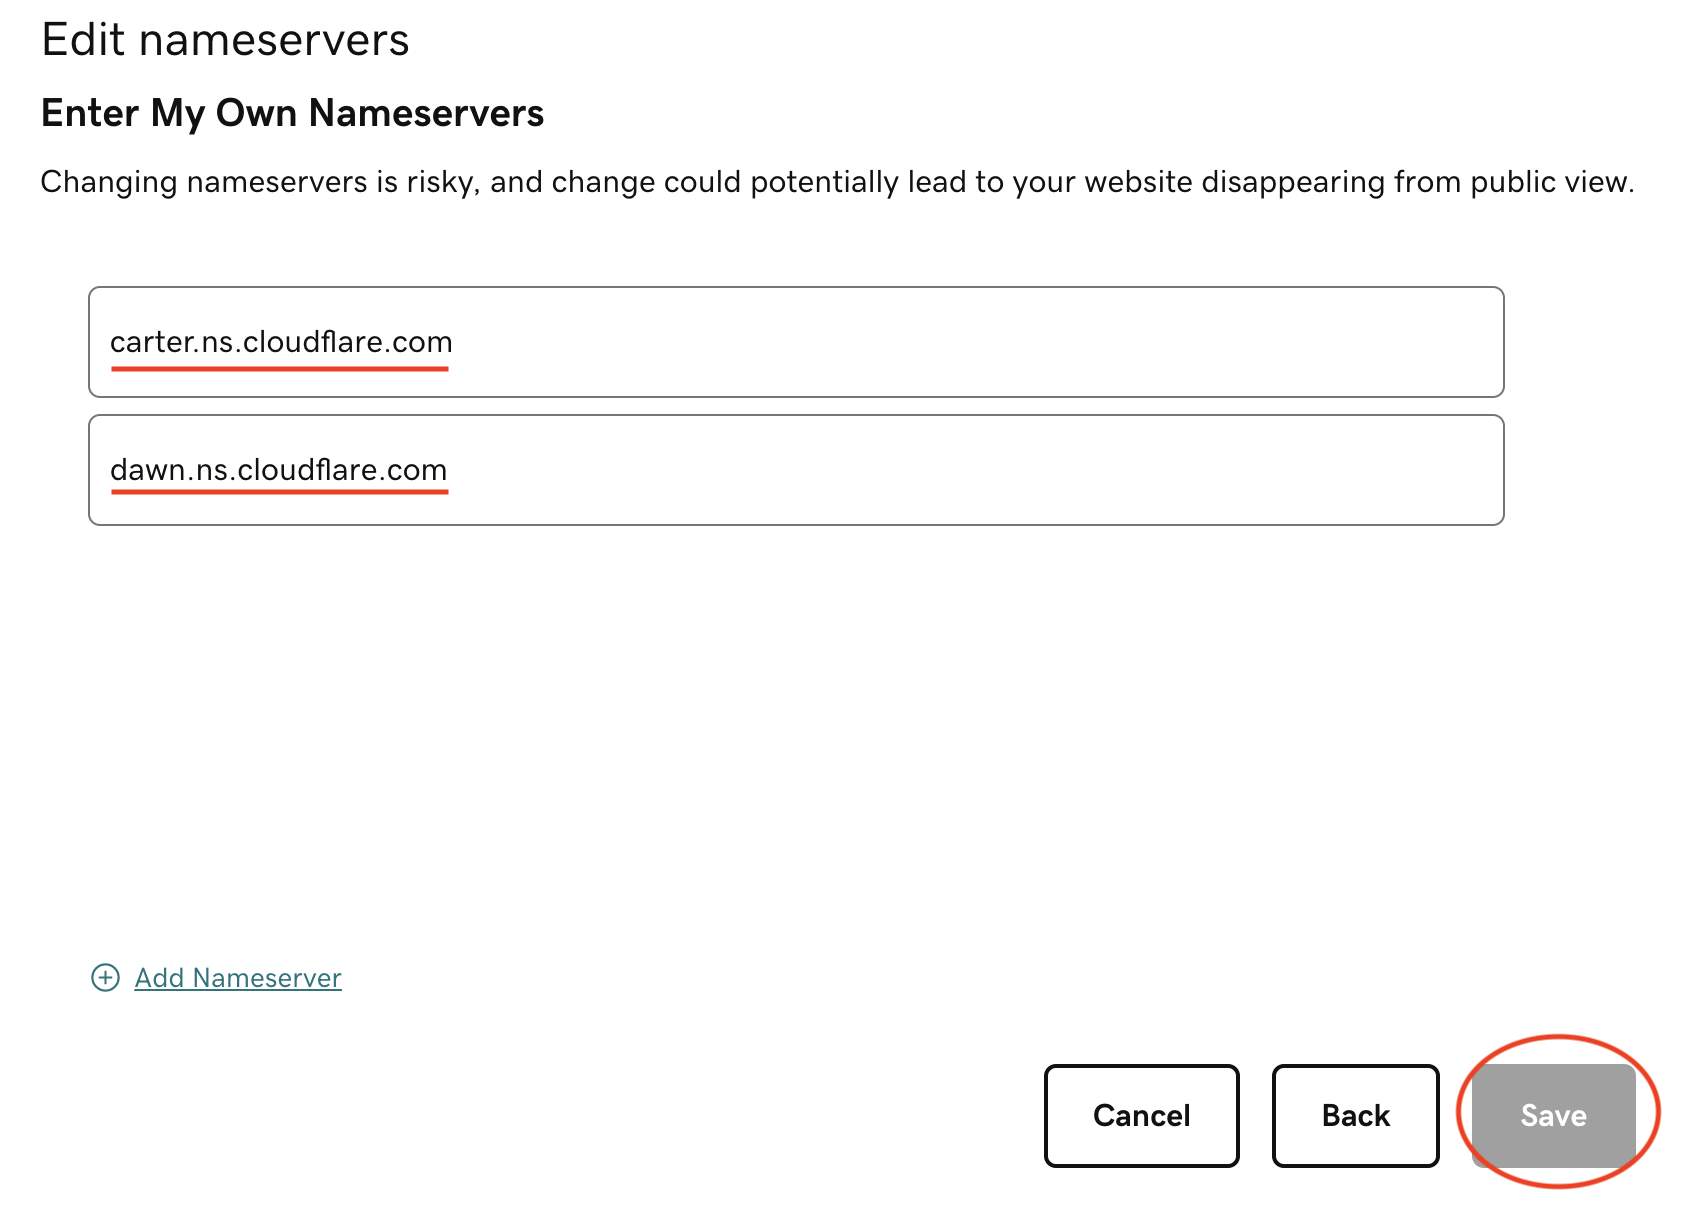
14. Paste the nameservers that you copied from Cloudflare (both of them) and click on save.
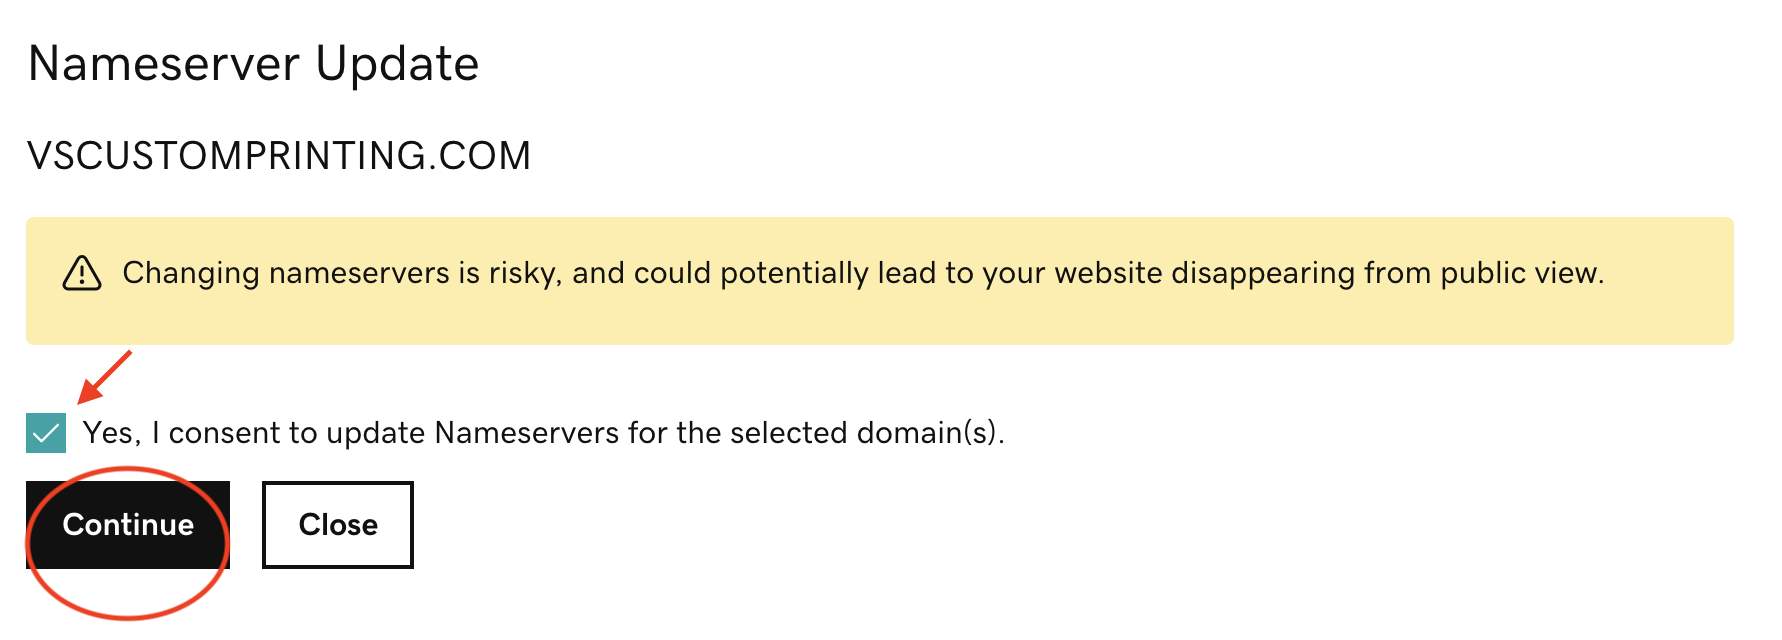
15. Check the Yes, I consent ... option and click on continue.
16. Go back to Cloudflare and click on done, check nameservers
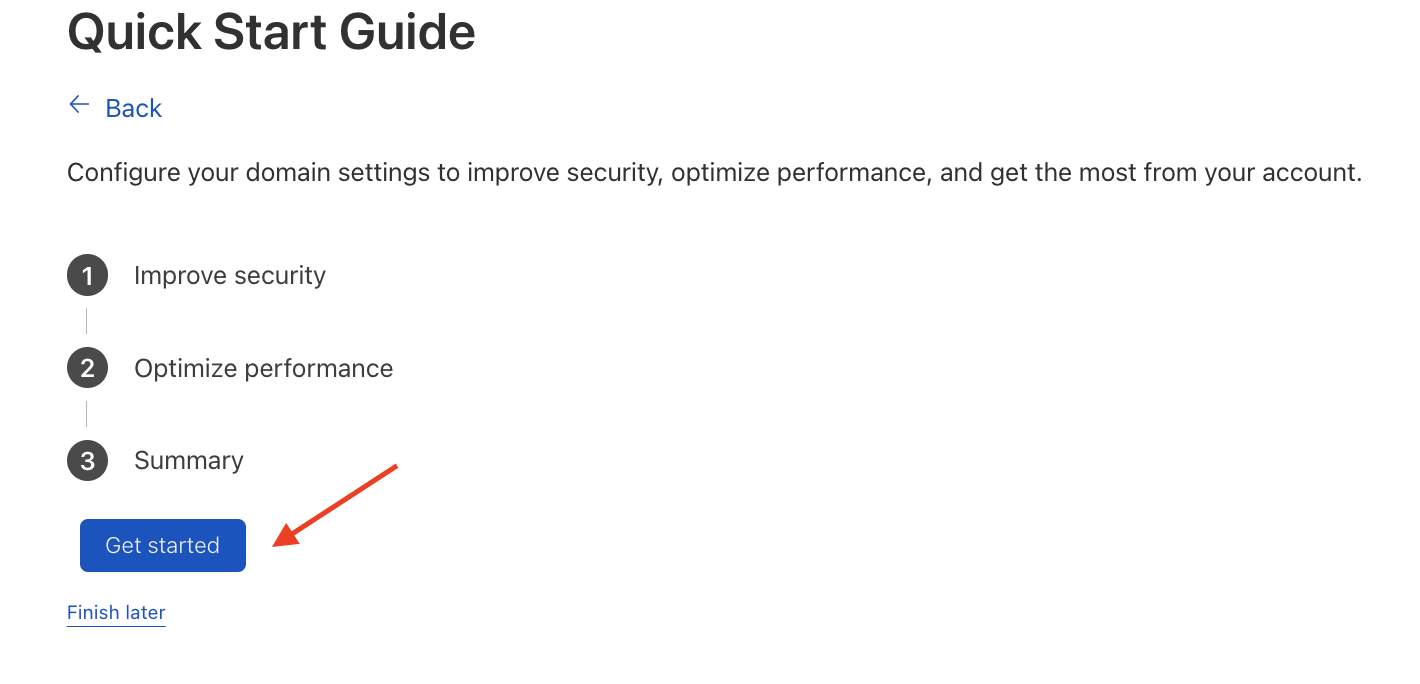
17. Click on Get started.
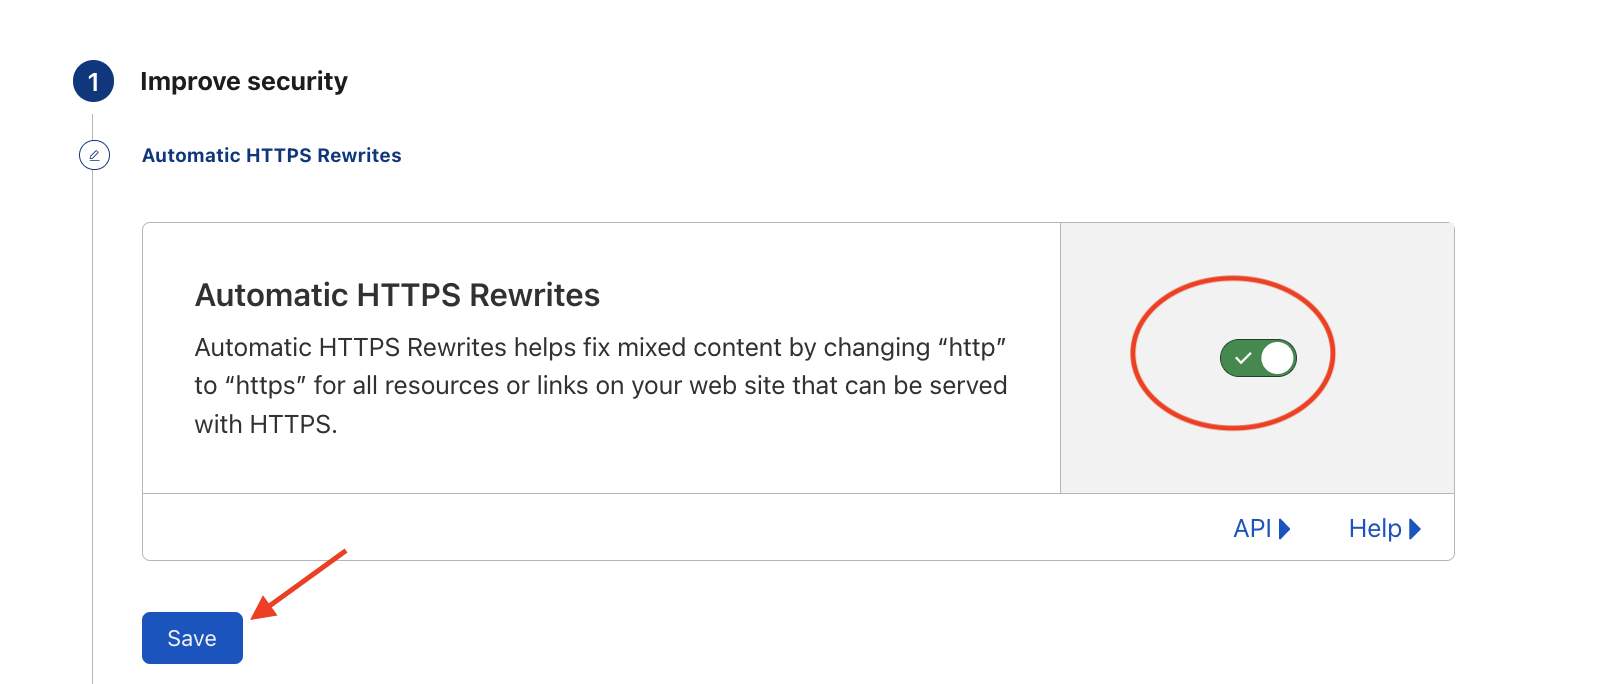
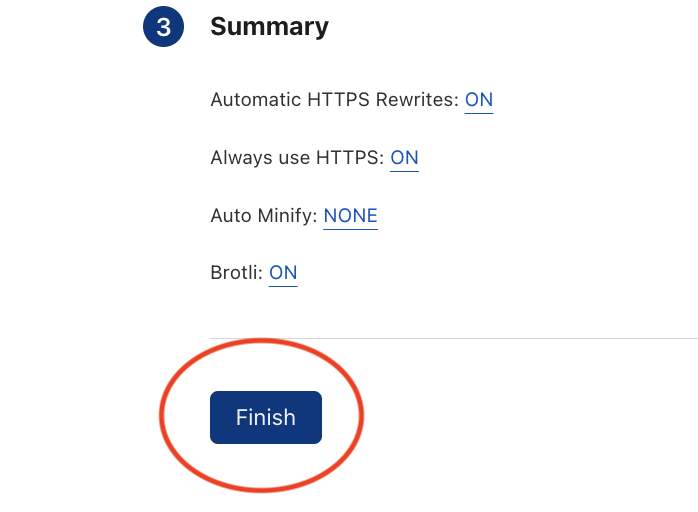
18. Automatic HTTPS REWRITES ON and click on Save.
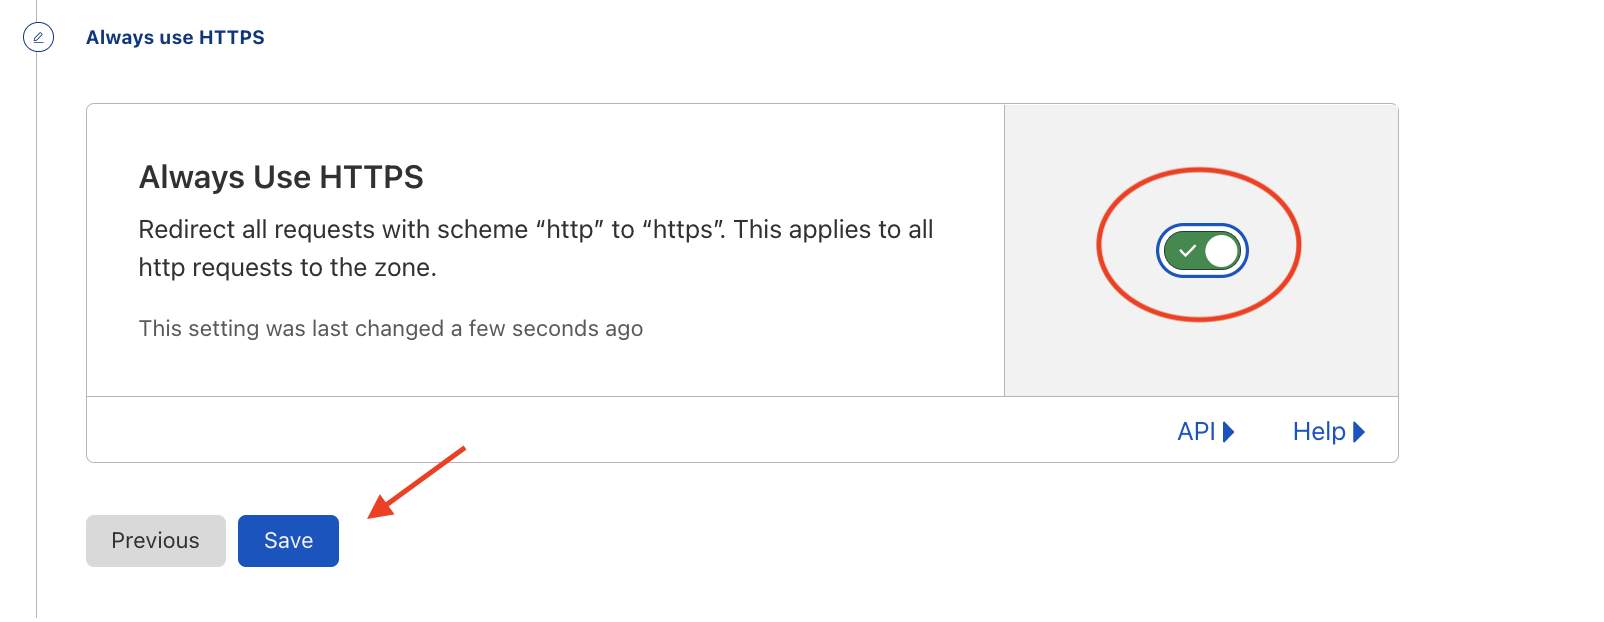
19. Always use HTTPS ON and click on Save
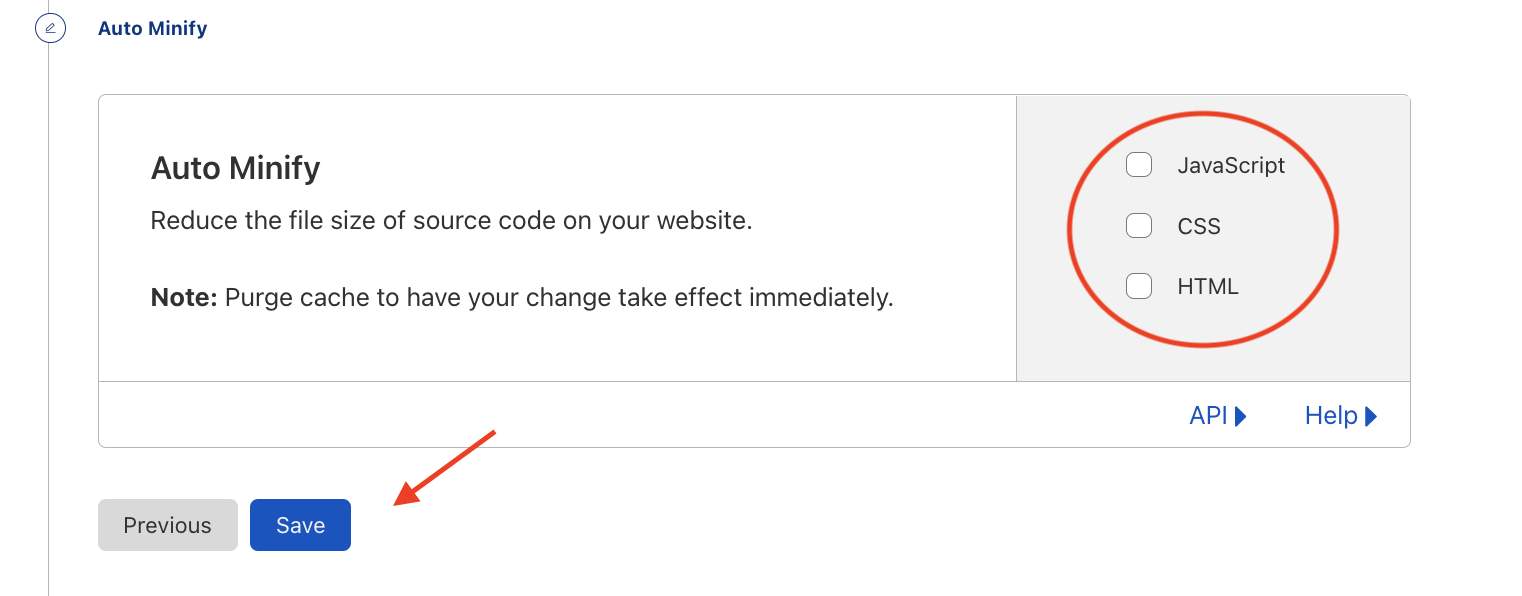
20. Auto Minify file will be applied once the website has been developed and it is a 100% in production in the mean time keep them off and click on Save.
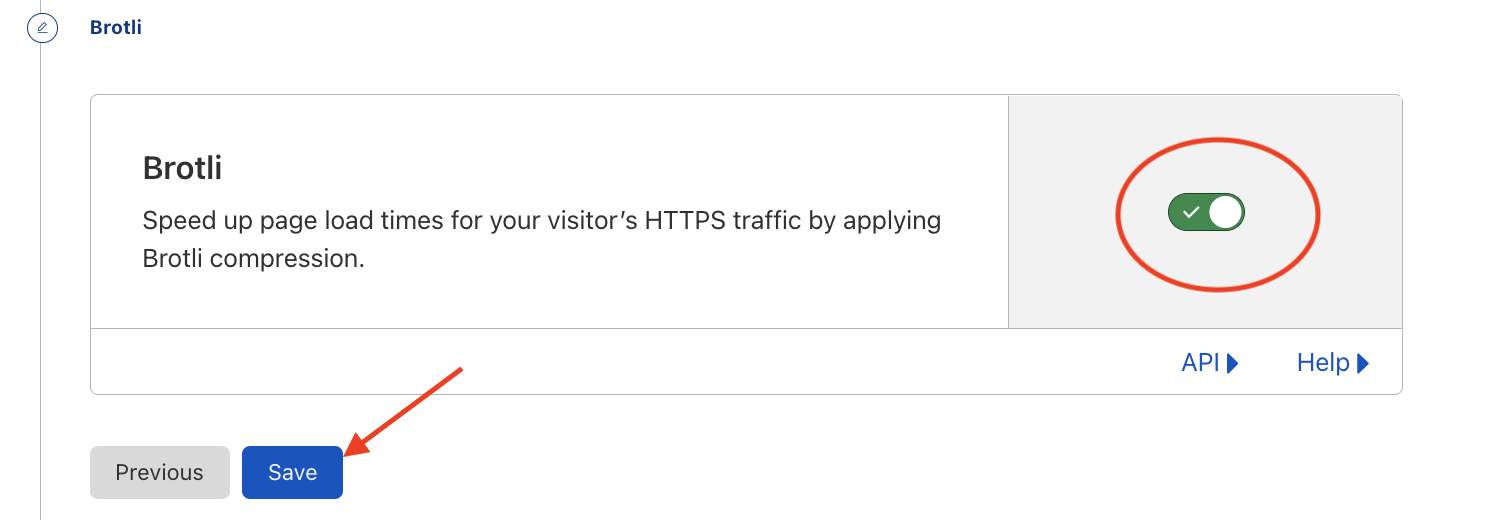
21. Brotli ON and click on Save.
22. Then click on Finish.
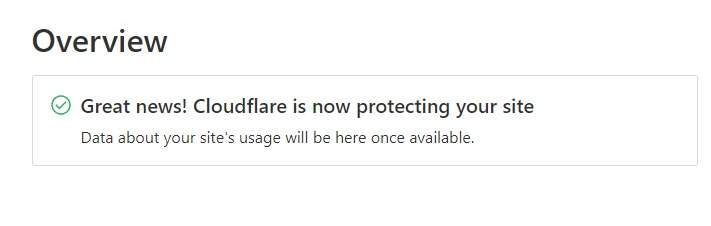
23. If your DNS were successfully changed you will see this message in the overview section of Cloudflare

Comments