
People love the iPhone because it is easy to use, for many headaches free, but when it comes to custom configuration it can be a nightmare and you might wish you had stick with your Android phone.
The easiest way to install a professional IMAP account on your phone is by getting an Android phone, you will benefit from many amazing features that Apple is just not able to offer. But if you are stuck with your iPhone then follow these simple steps.
Before starting make sure that you have the following information, if you don't have it ask your mail server manager to provide it:
- The email address to add
- Username (usually is also the email address)
- Password (it is case sensitive!)
- Incoming mail server (usually mail.yourdomain.com)
- Outgoing mail server (usually mail.yourdomain.com or smtp.yourdomain.com)
- Incoming mail PORT (for IMAP SSL connections usually 993 or 995 for POP with SSL)
- Outgoing mail PORT (for SSL connections usually 465 or 587)
- SSL Instructions for both, incoming and outgoing.
Let's get started:
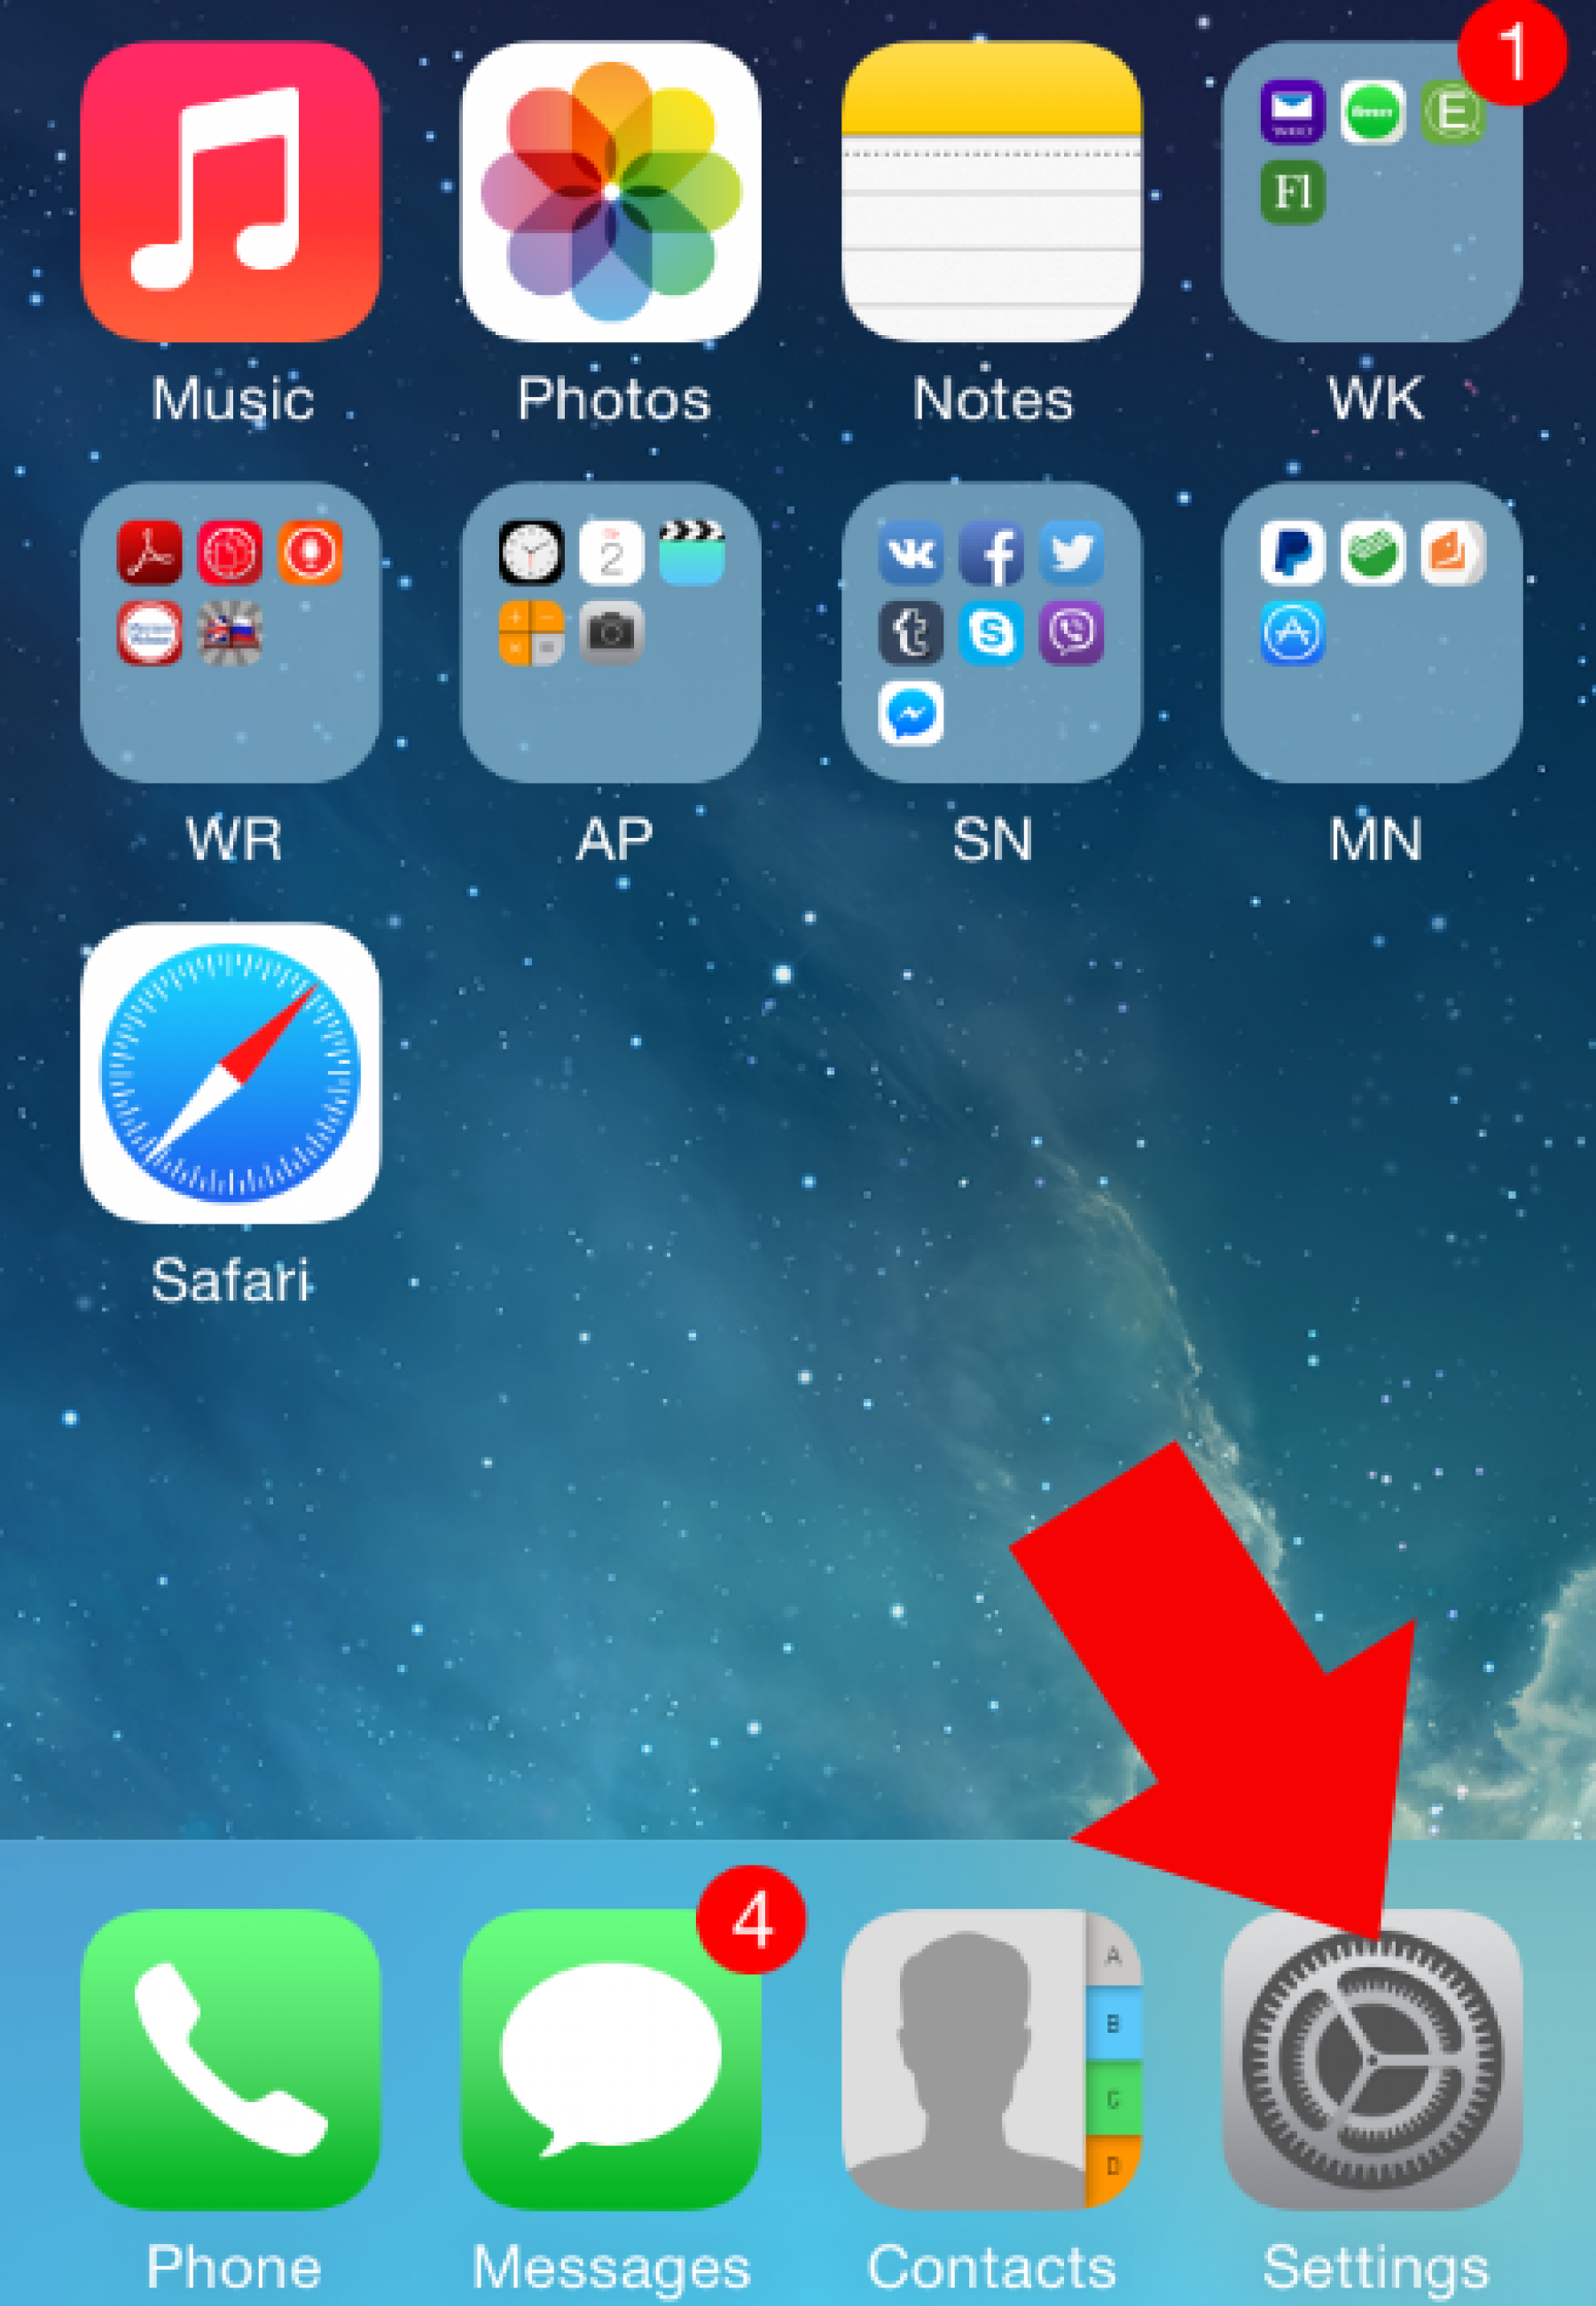
- Open your settings.
- Depending on your iOS version you would need to choose either" Mail, Contacts, Calendar" or "Accounts & Passwords"
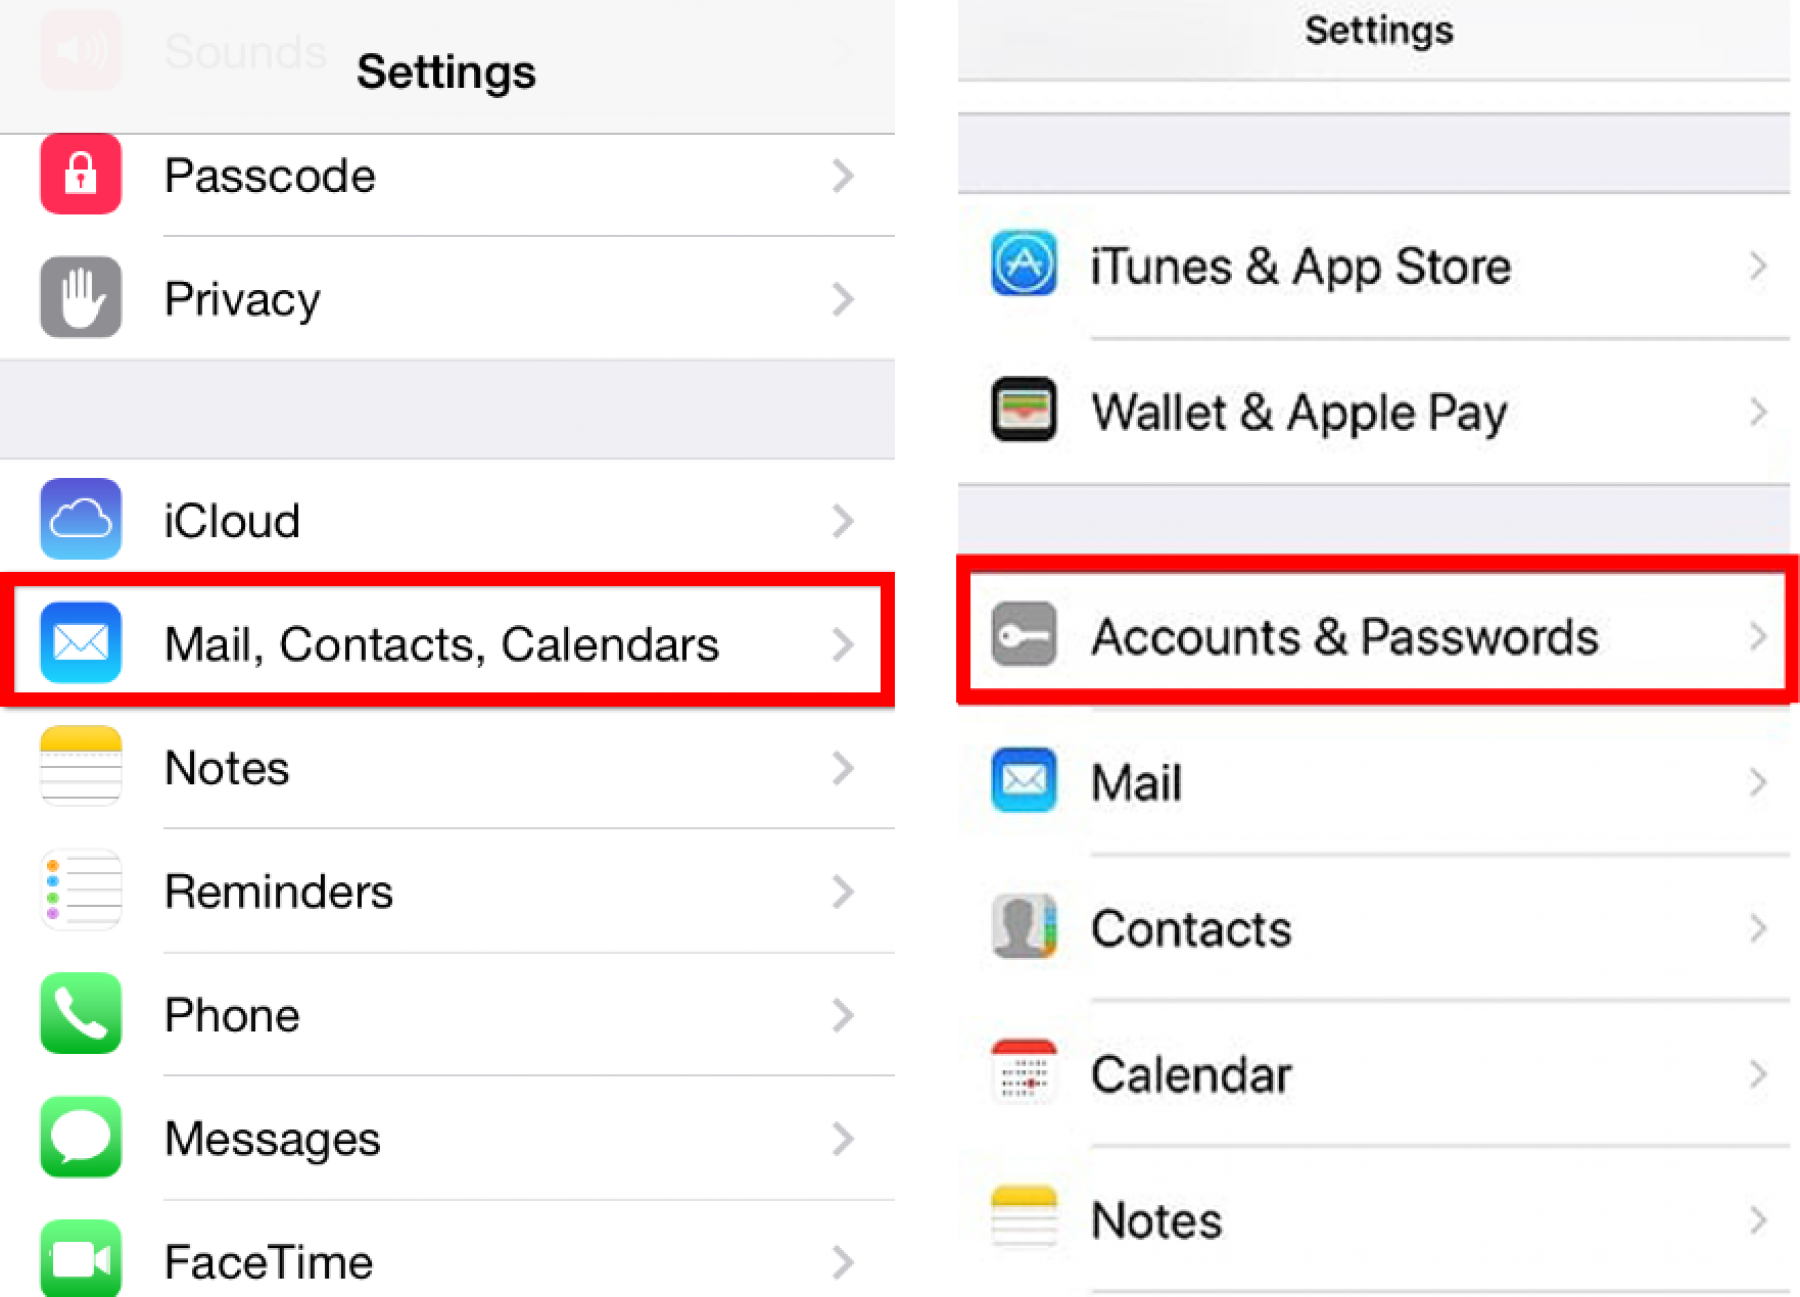
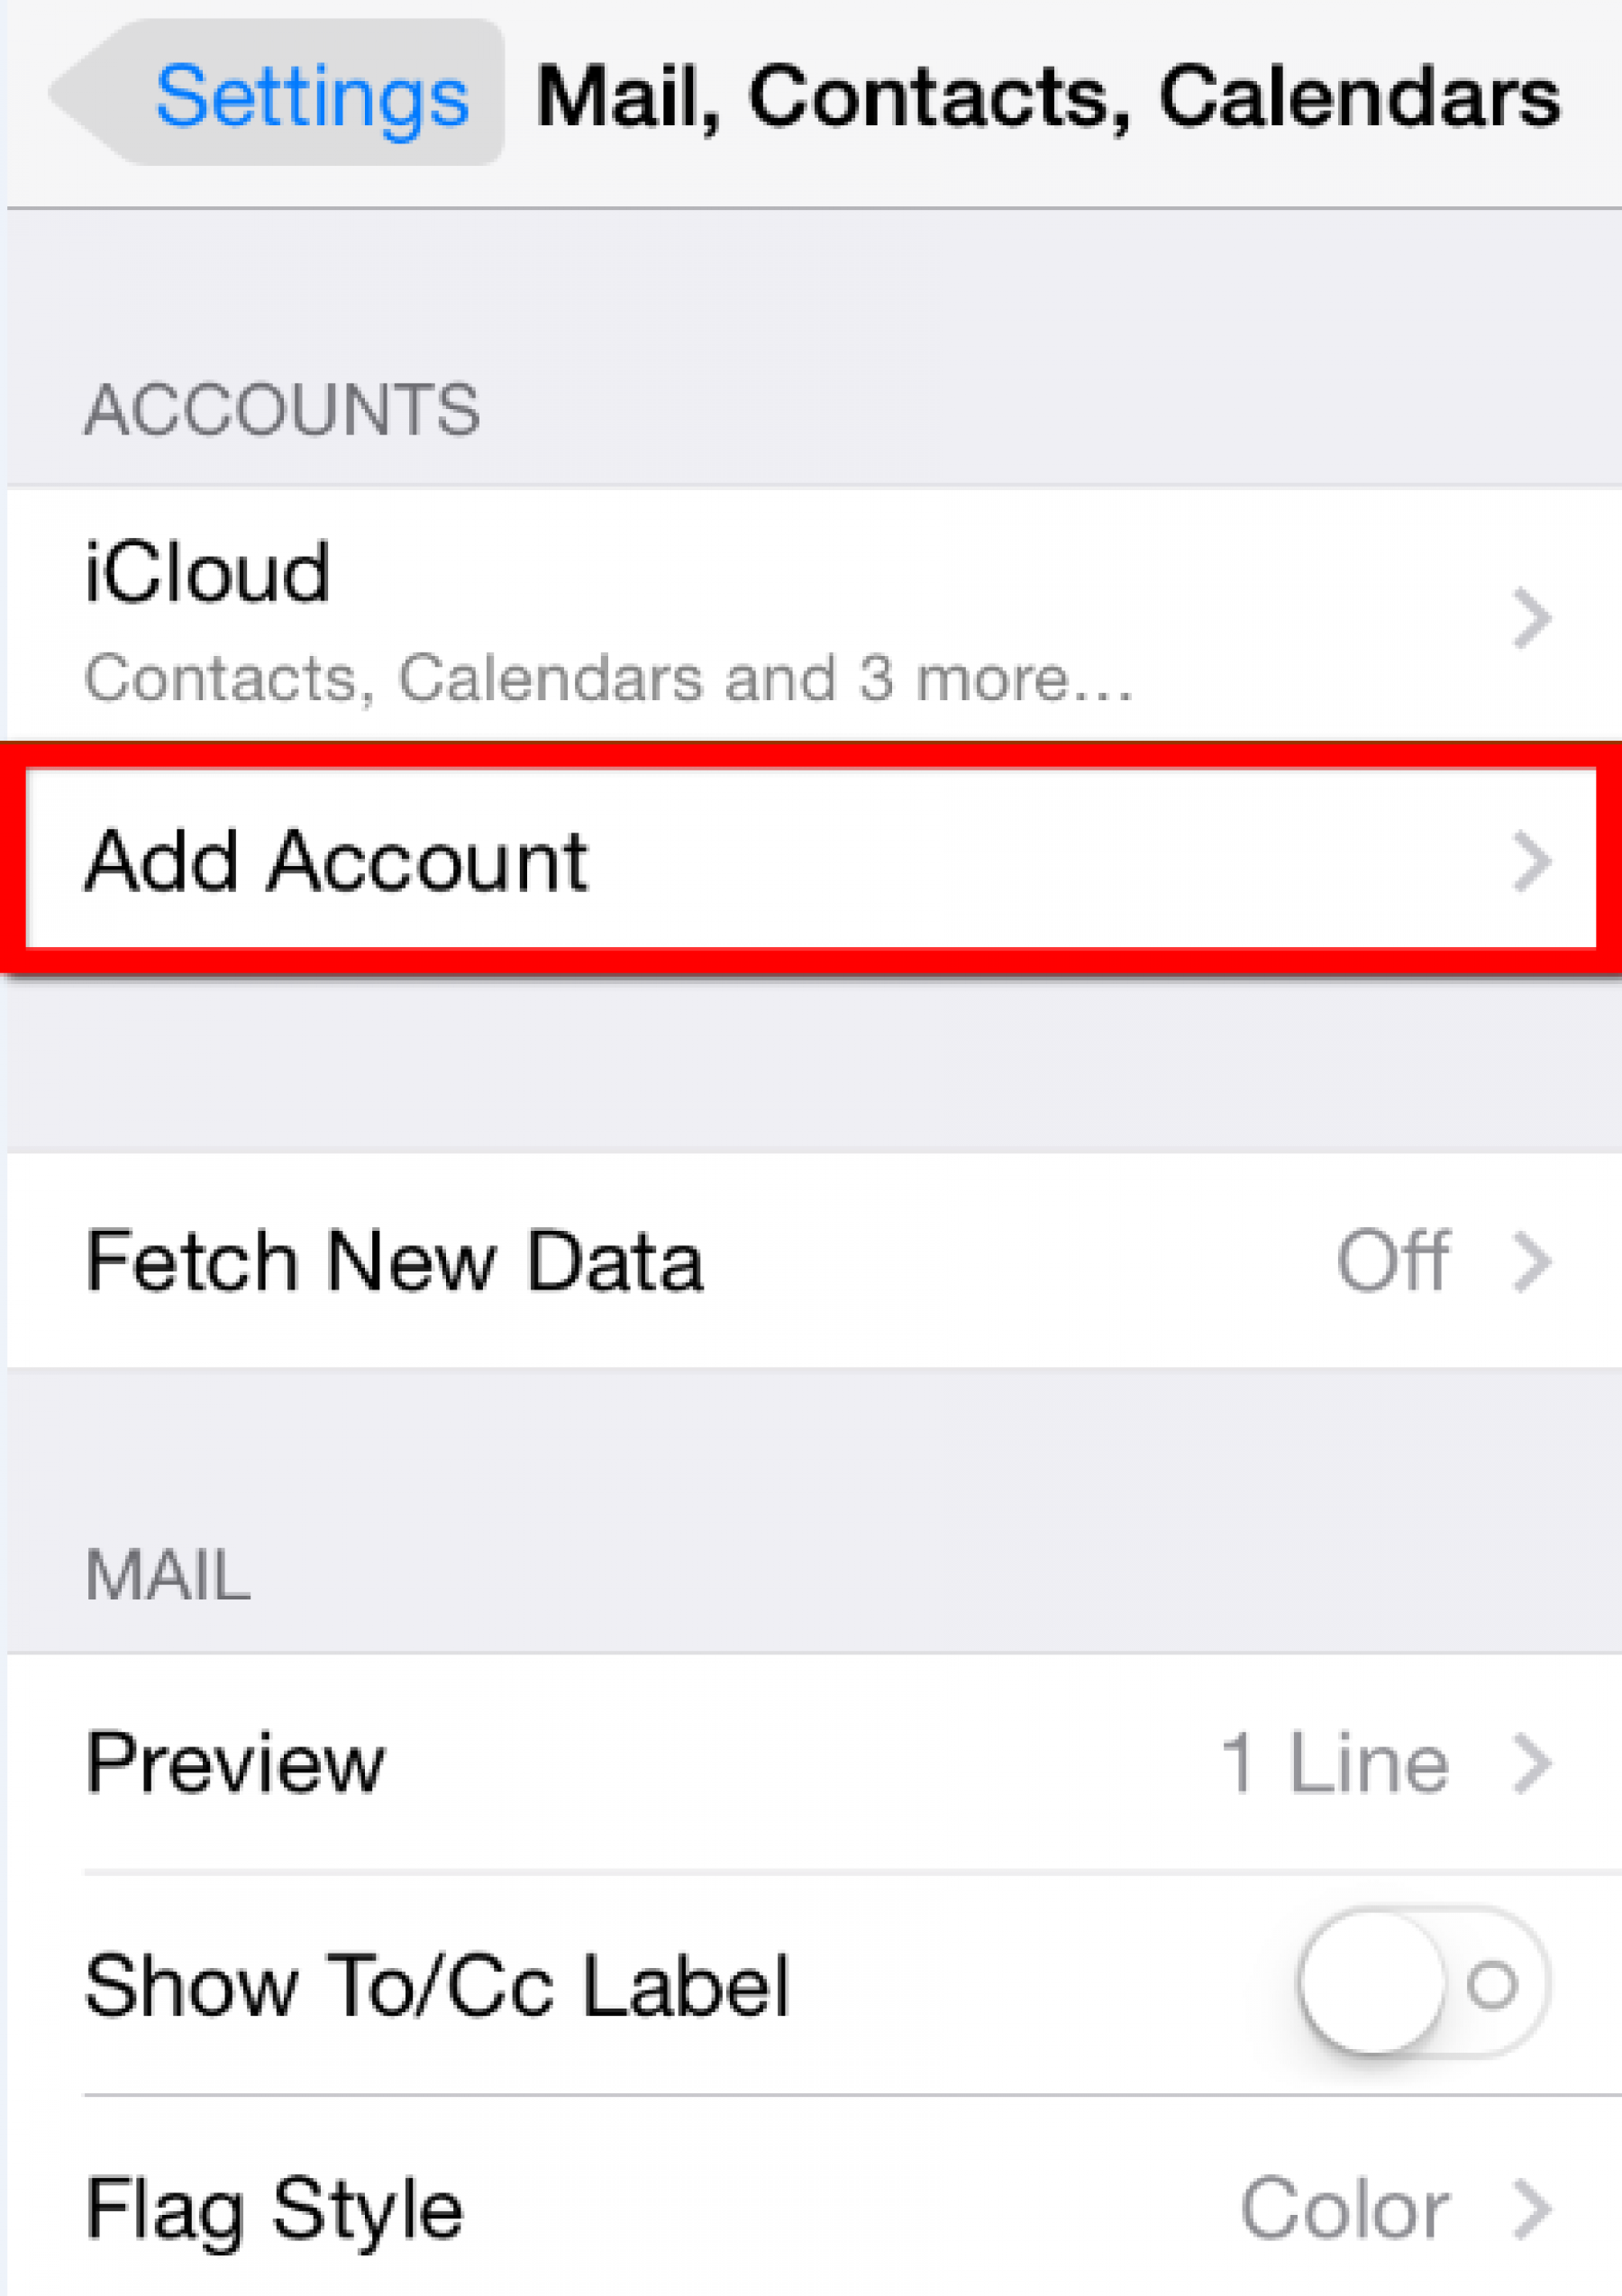
- On the next screen you should see "Add Account".
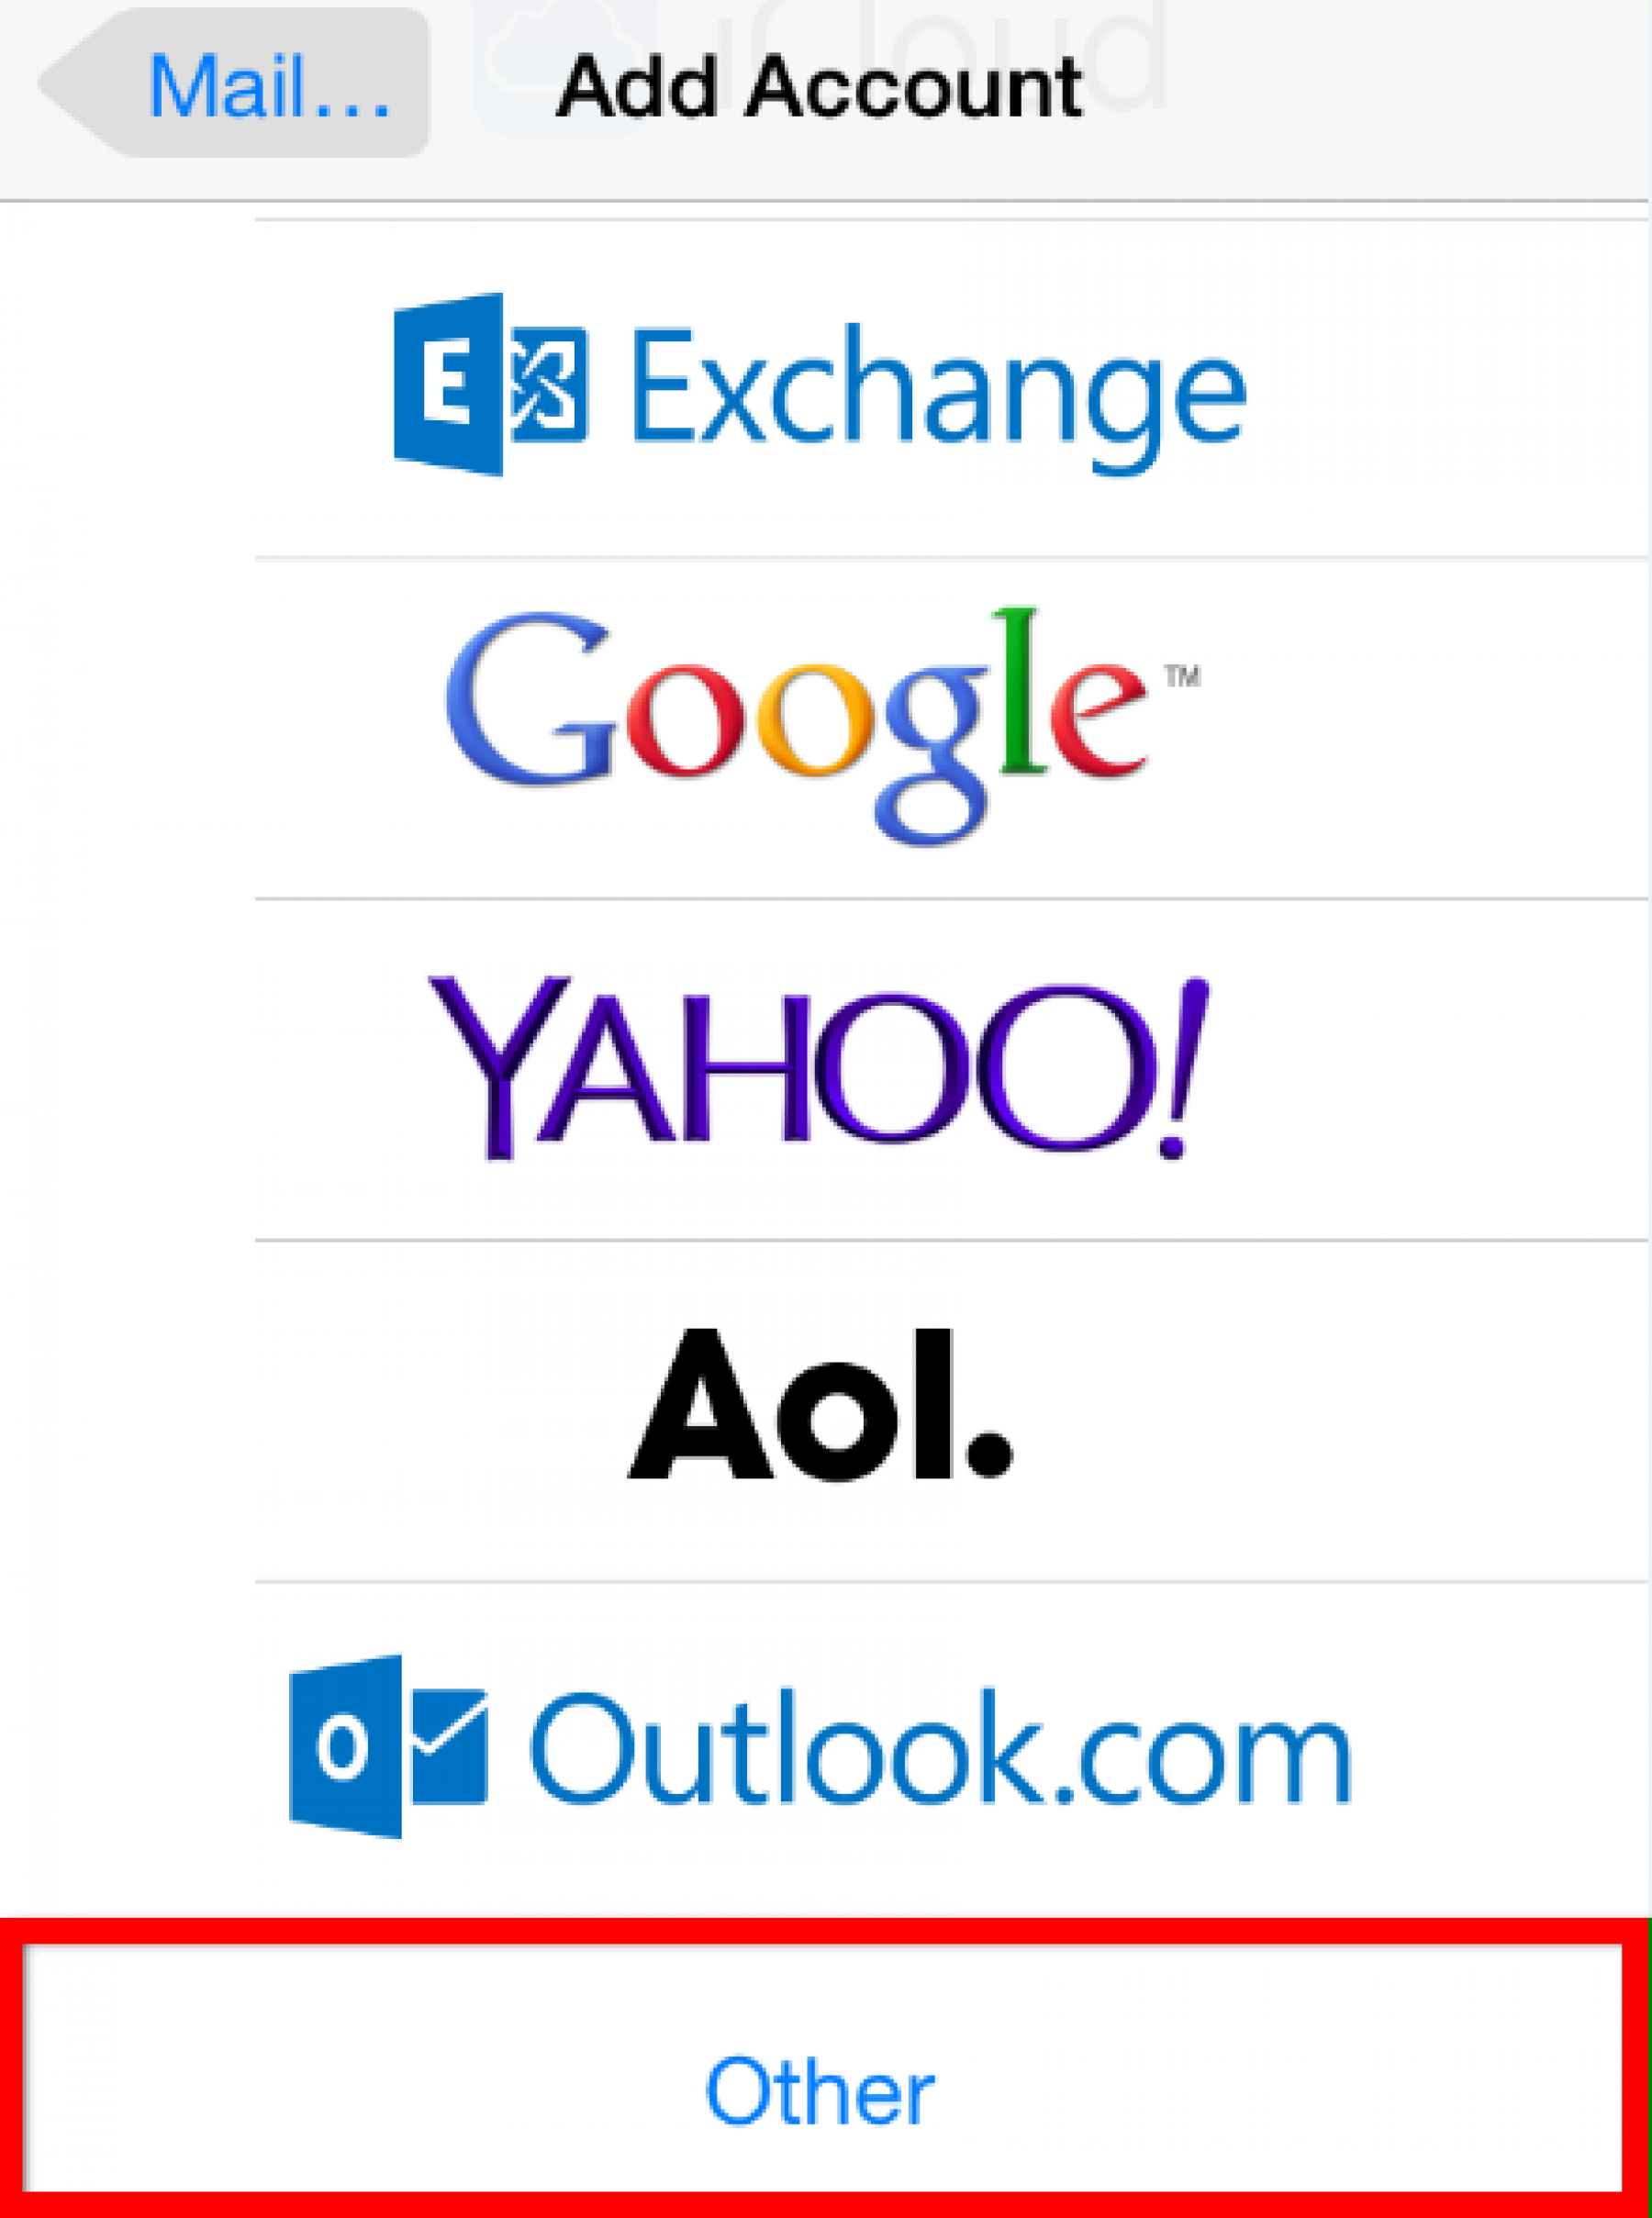
- Select the last option on the screen "Other"
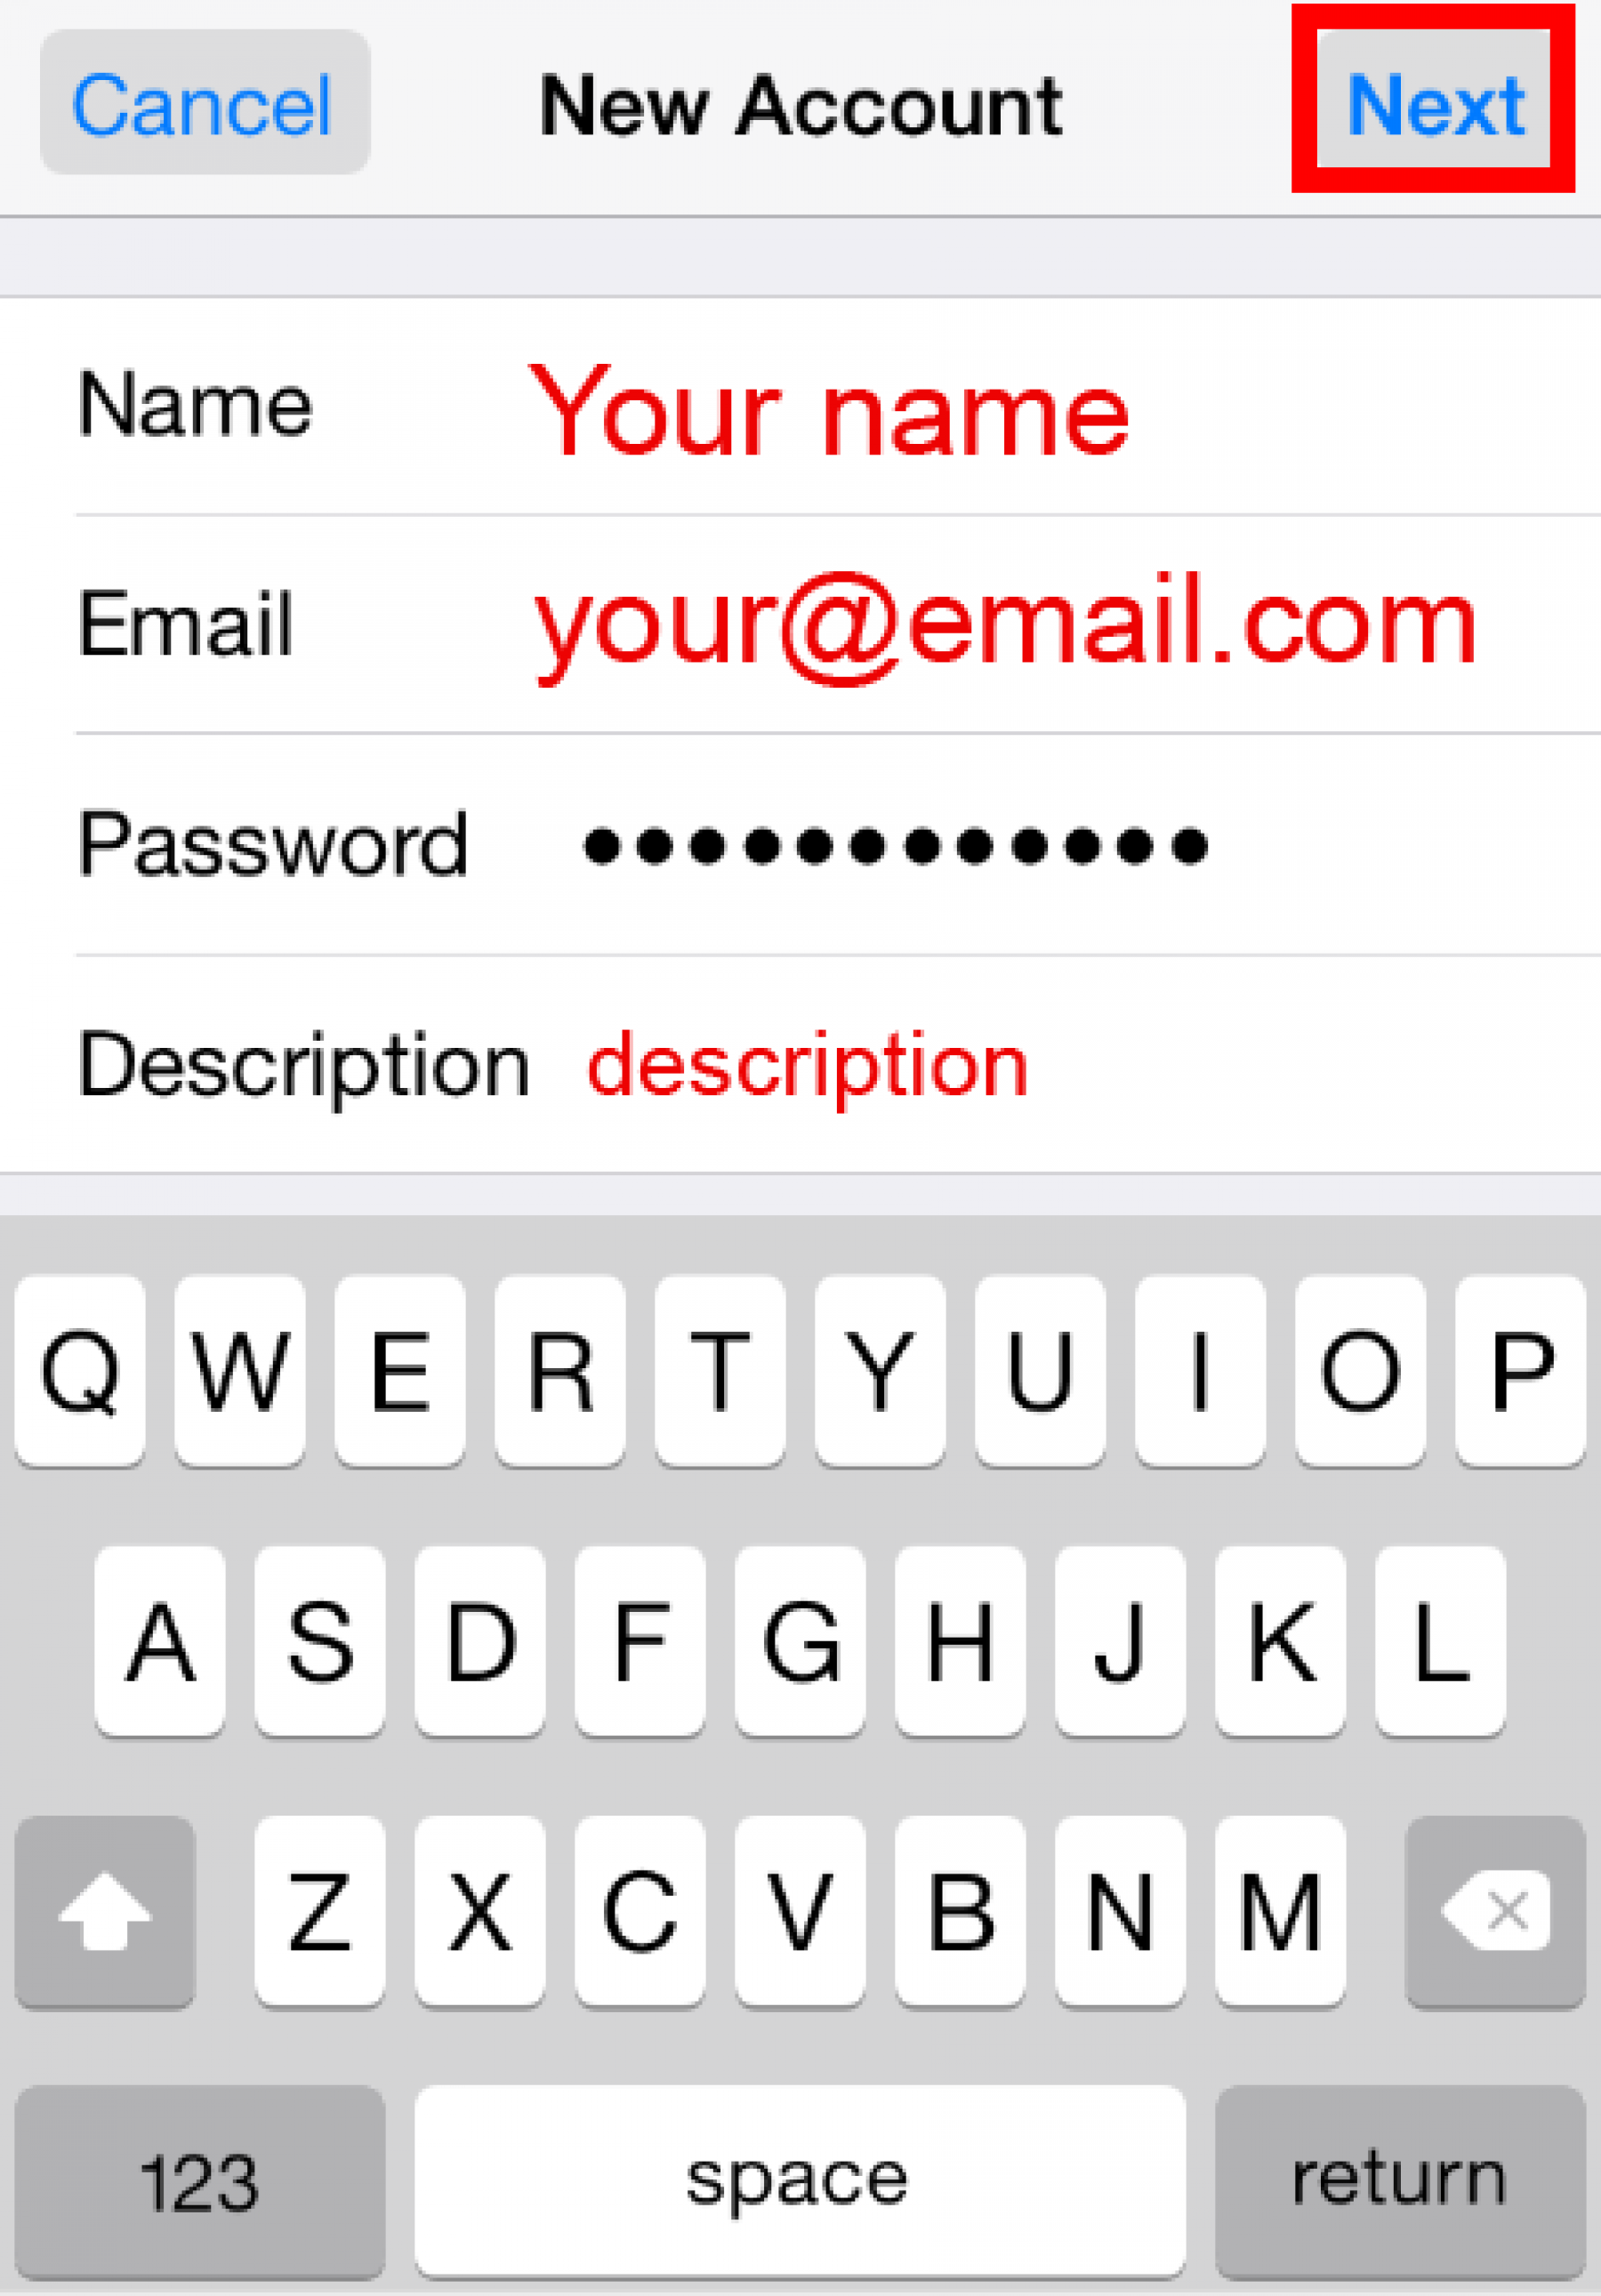
- Enter your name, full email, password and write a short description that would let you identify the email account in case you have more than one. Click Next
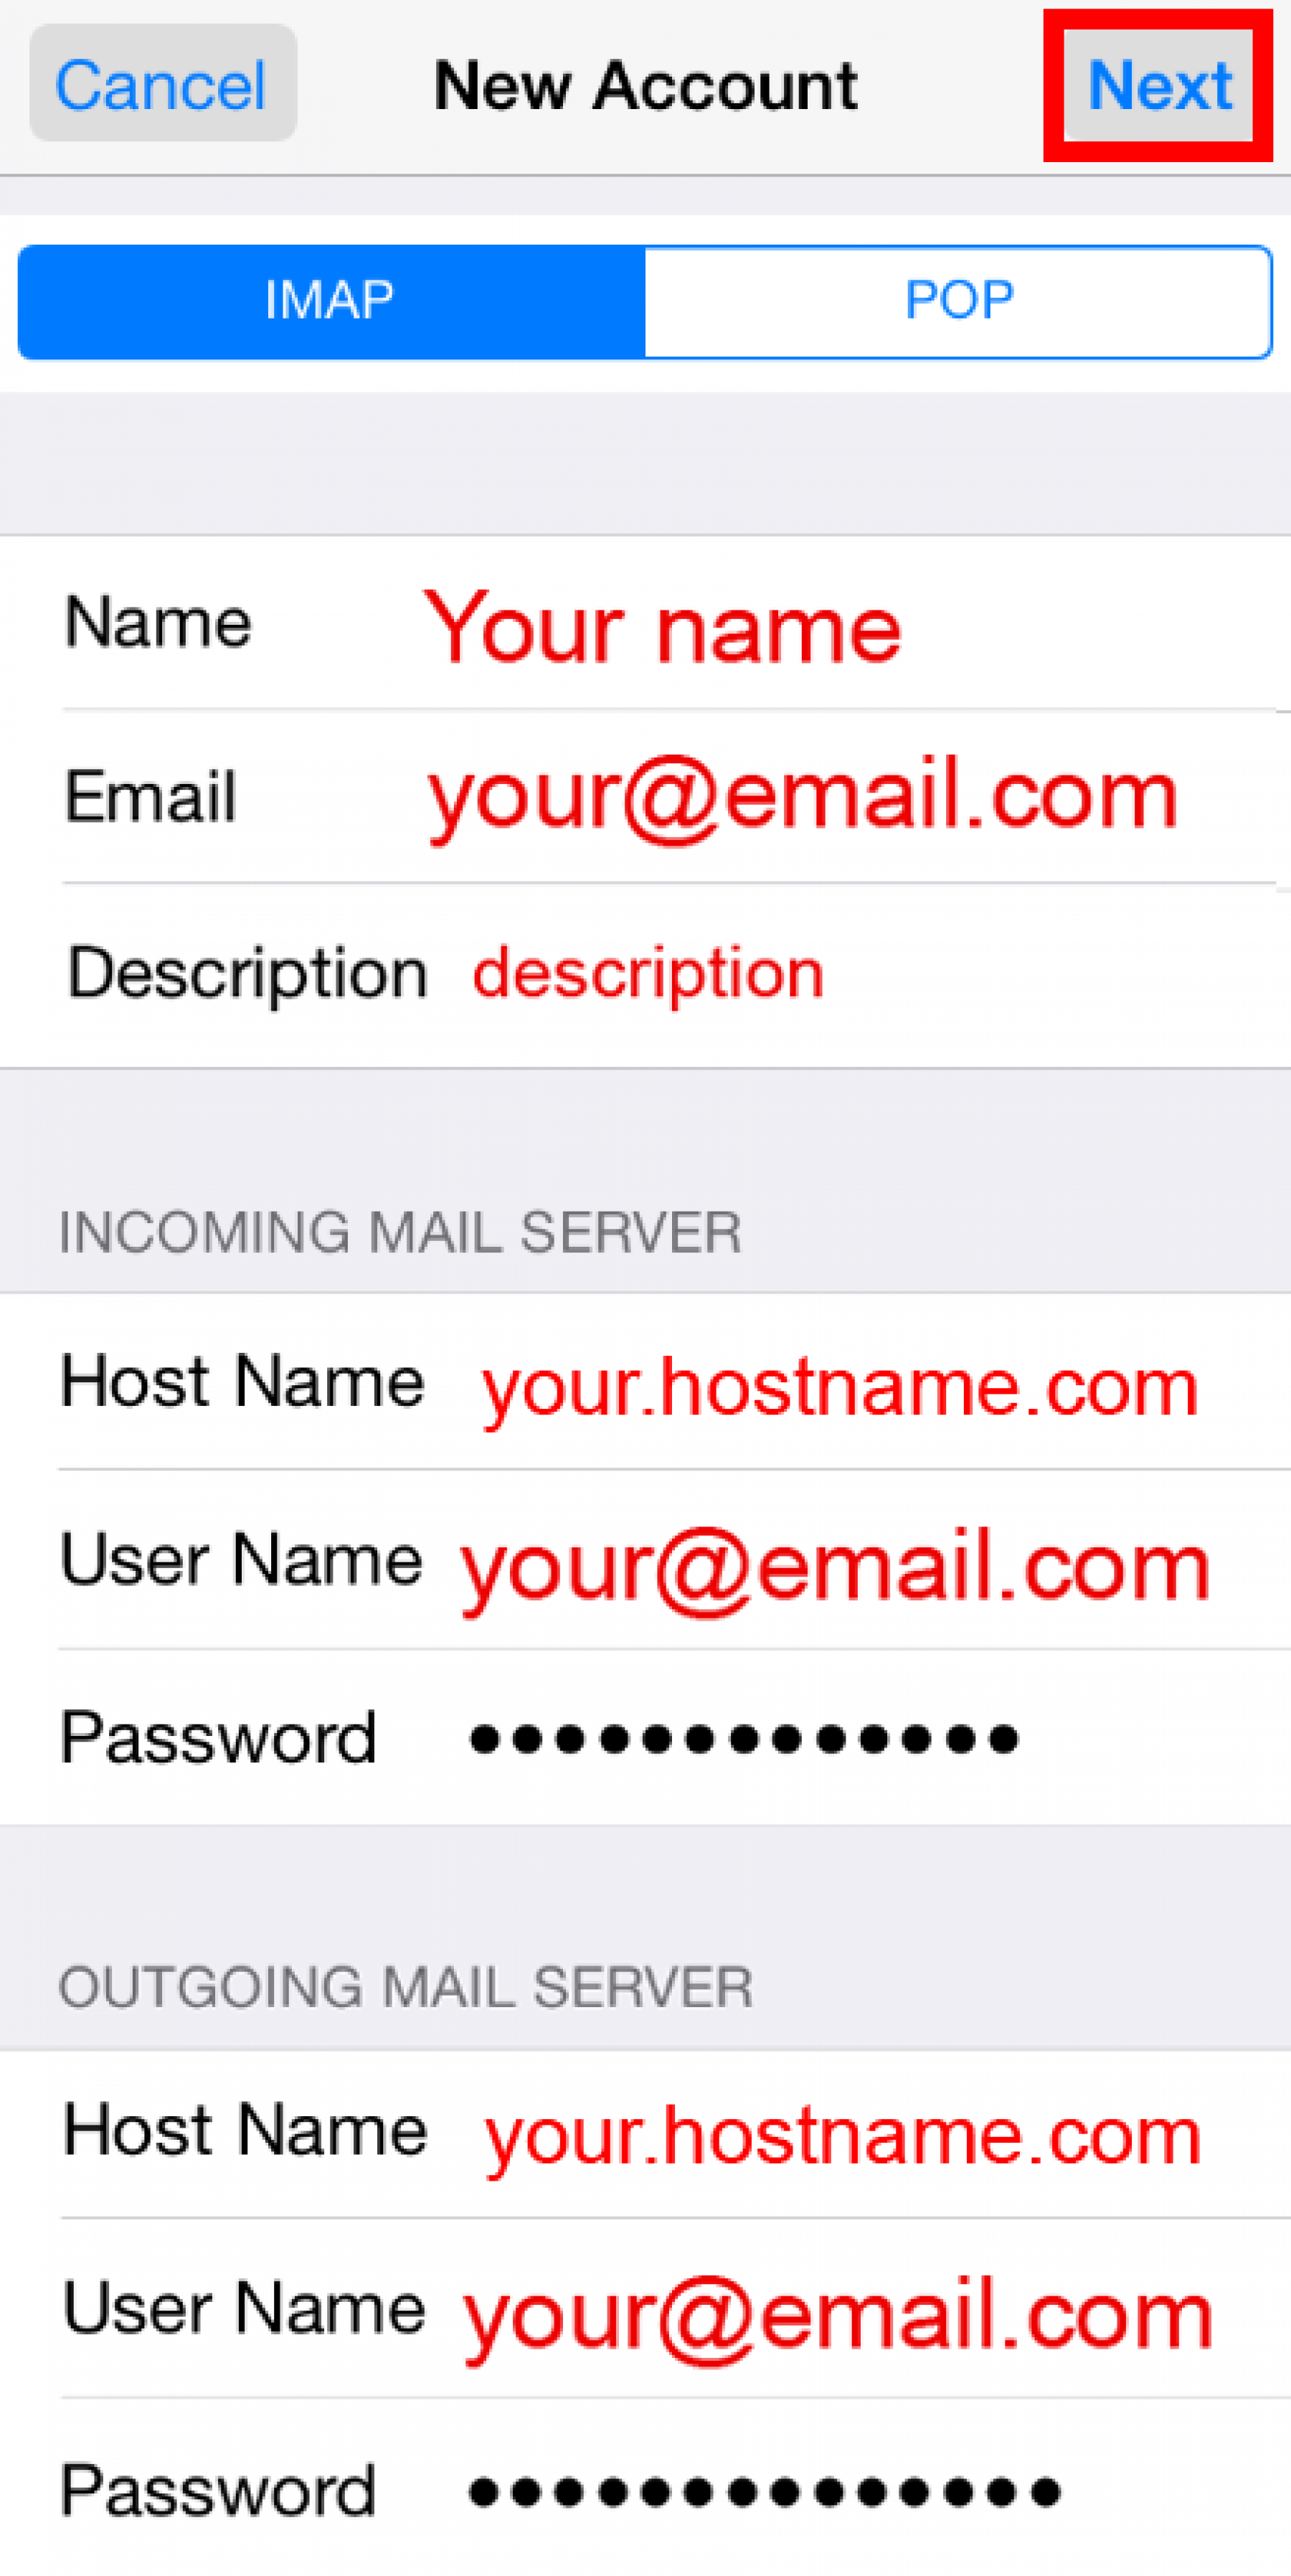
- Here is where things might start getting a bit frustrating but be patient. The iPhone will try to automatically find the right configuration by itself and load for a while, but it will fail, once it fails fill up the fields with your incoming and outgoing hostname (mail server), username and password. Most of the times the email is also de username and the mail server might be the same on both, incoming and outgoing. As we mentioned before, your server administrator will be able to provide you with all the details. Click Next.
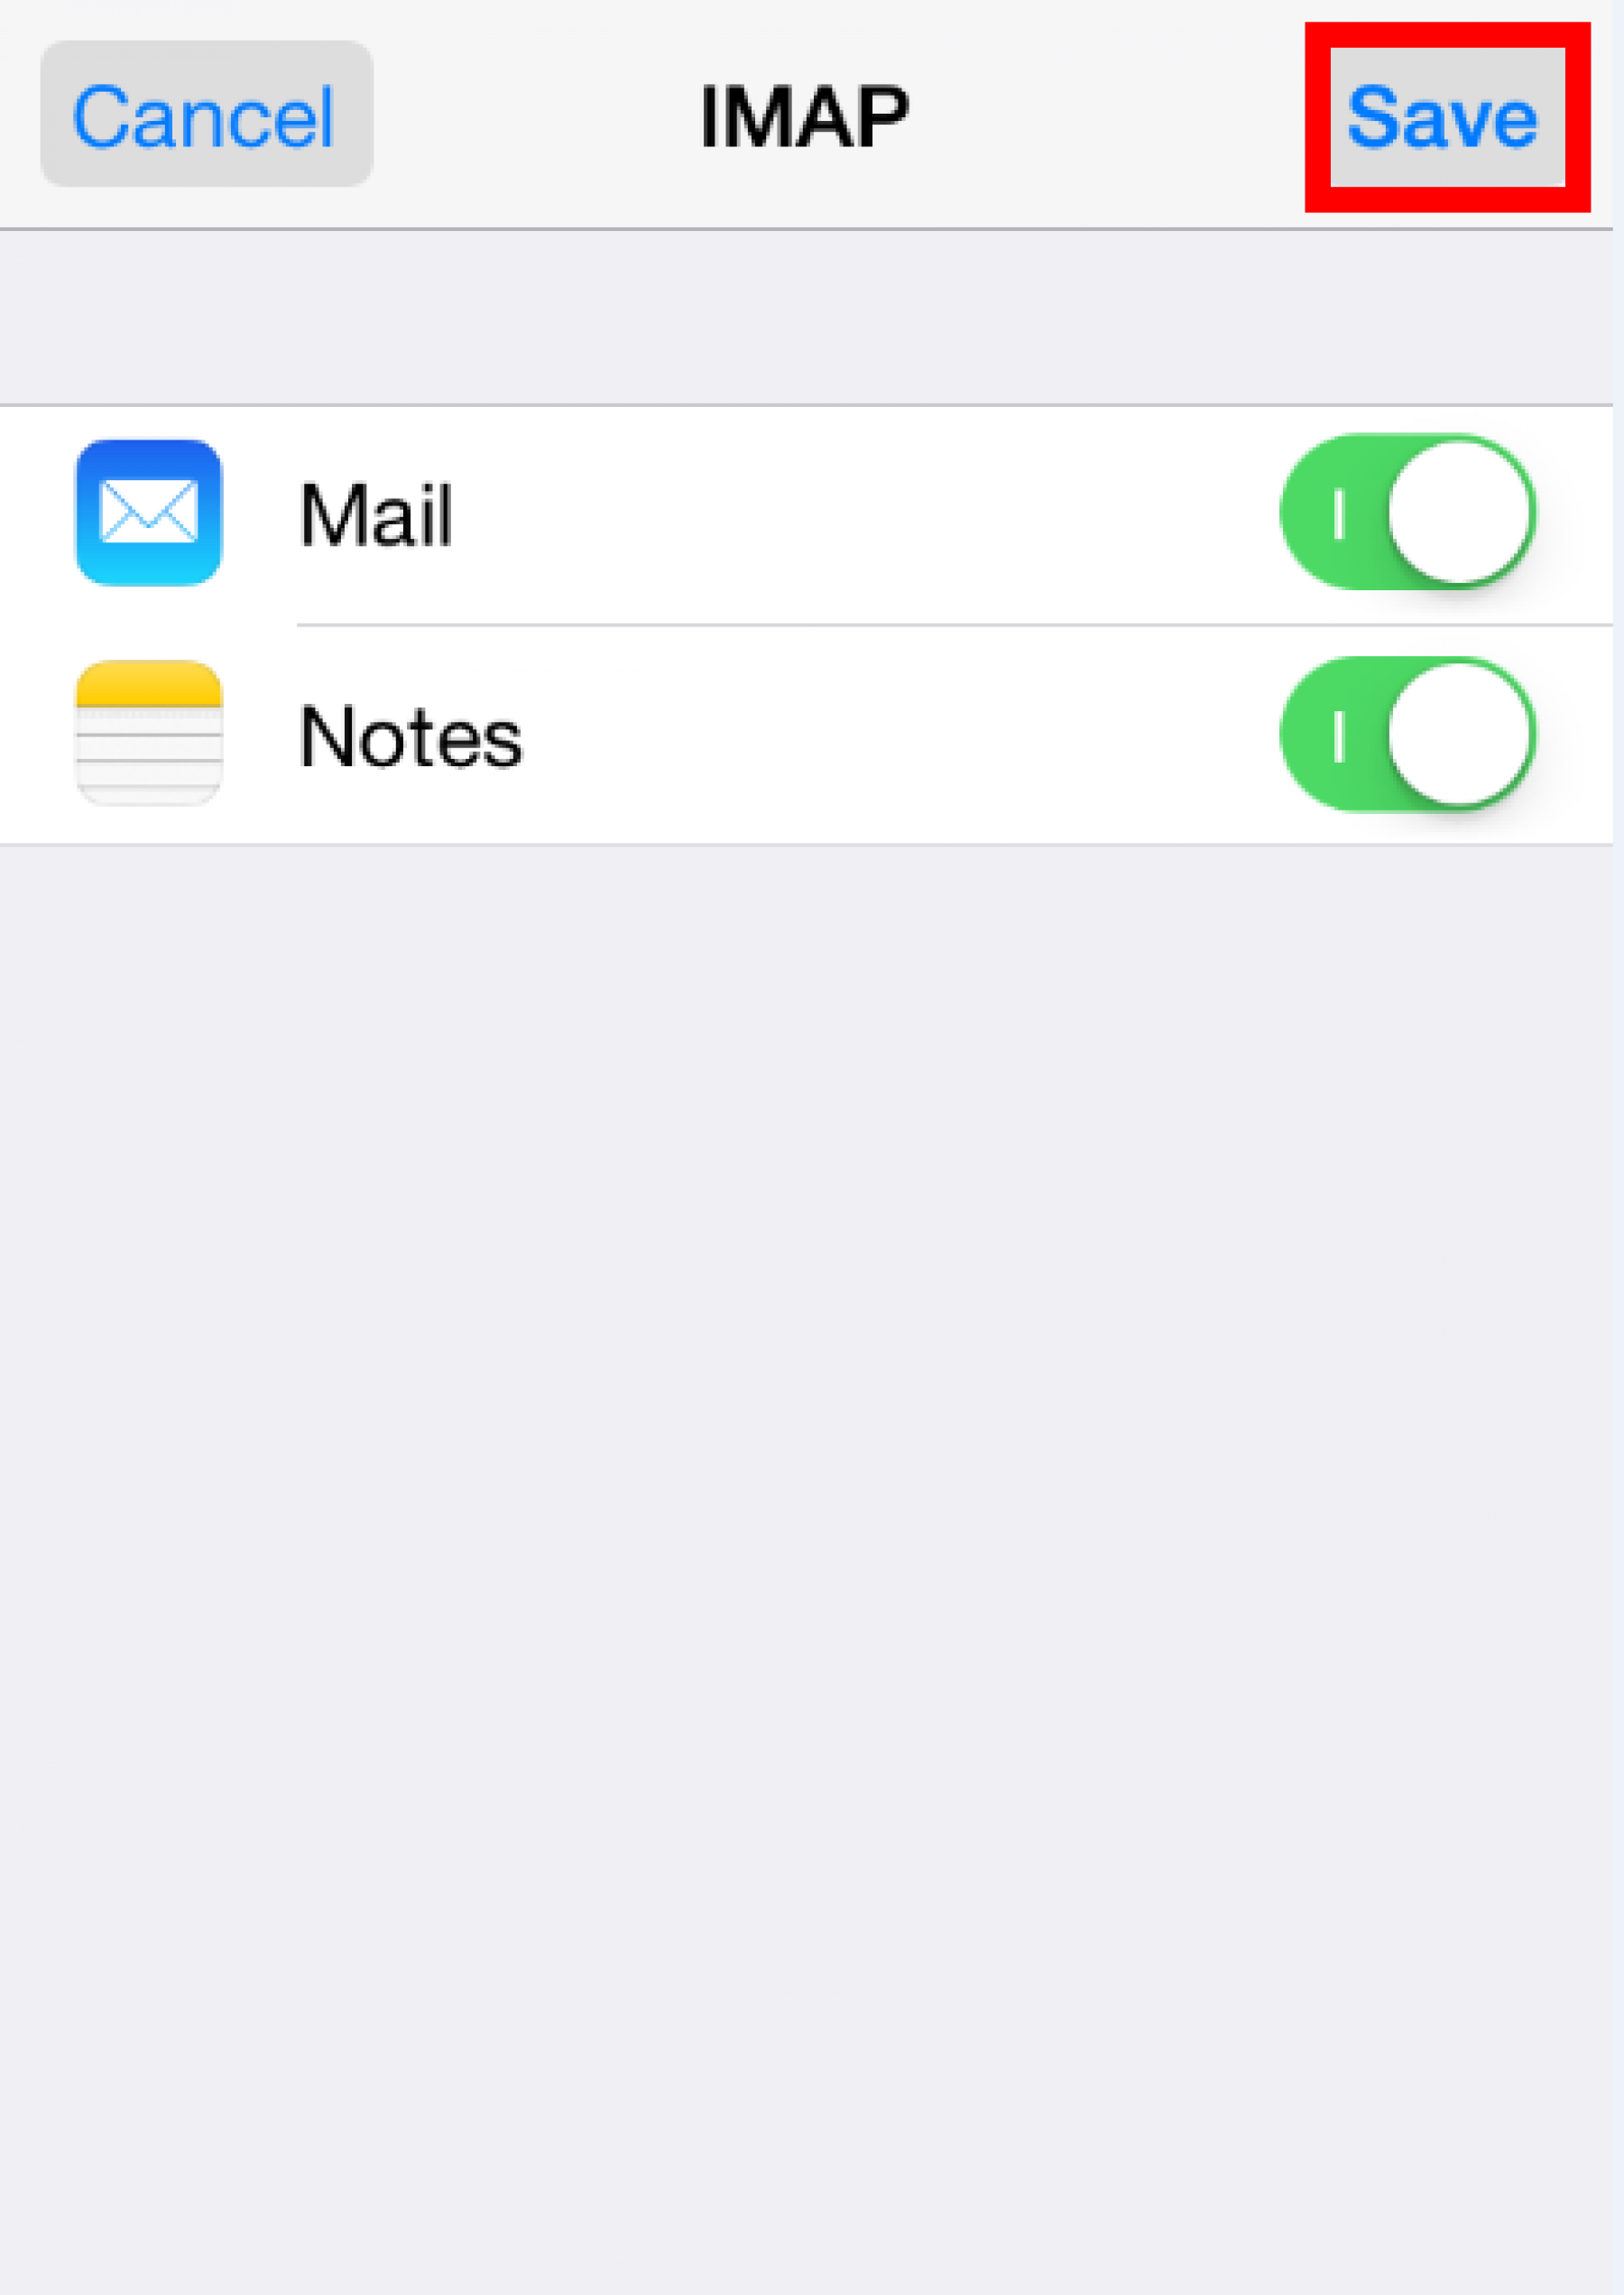
- Again the iPhone might try to configure the rest by itself and load for a long time, if you get any warnings saying that the configuration is not correct or it was not set up properly just ignore it and accept to continue. Then click Save and continue.
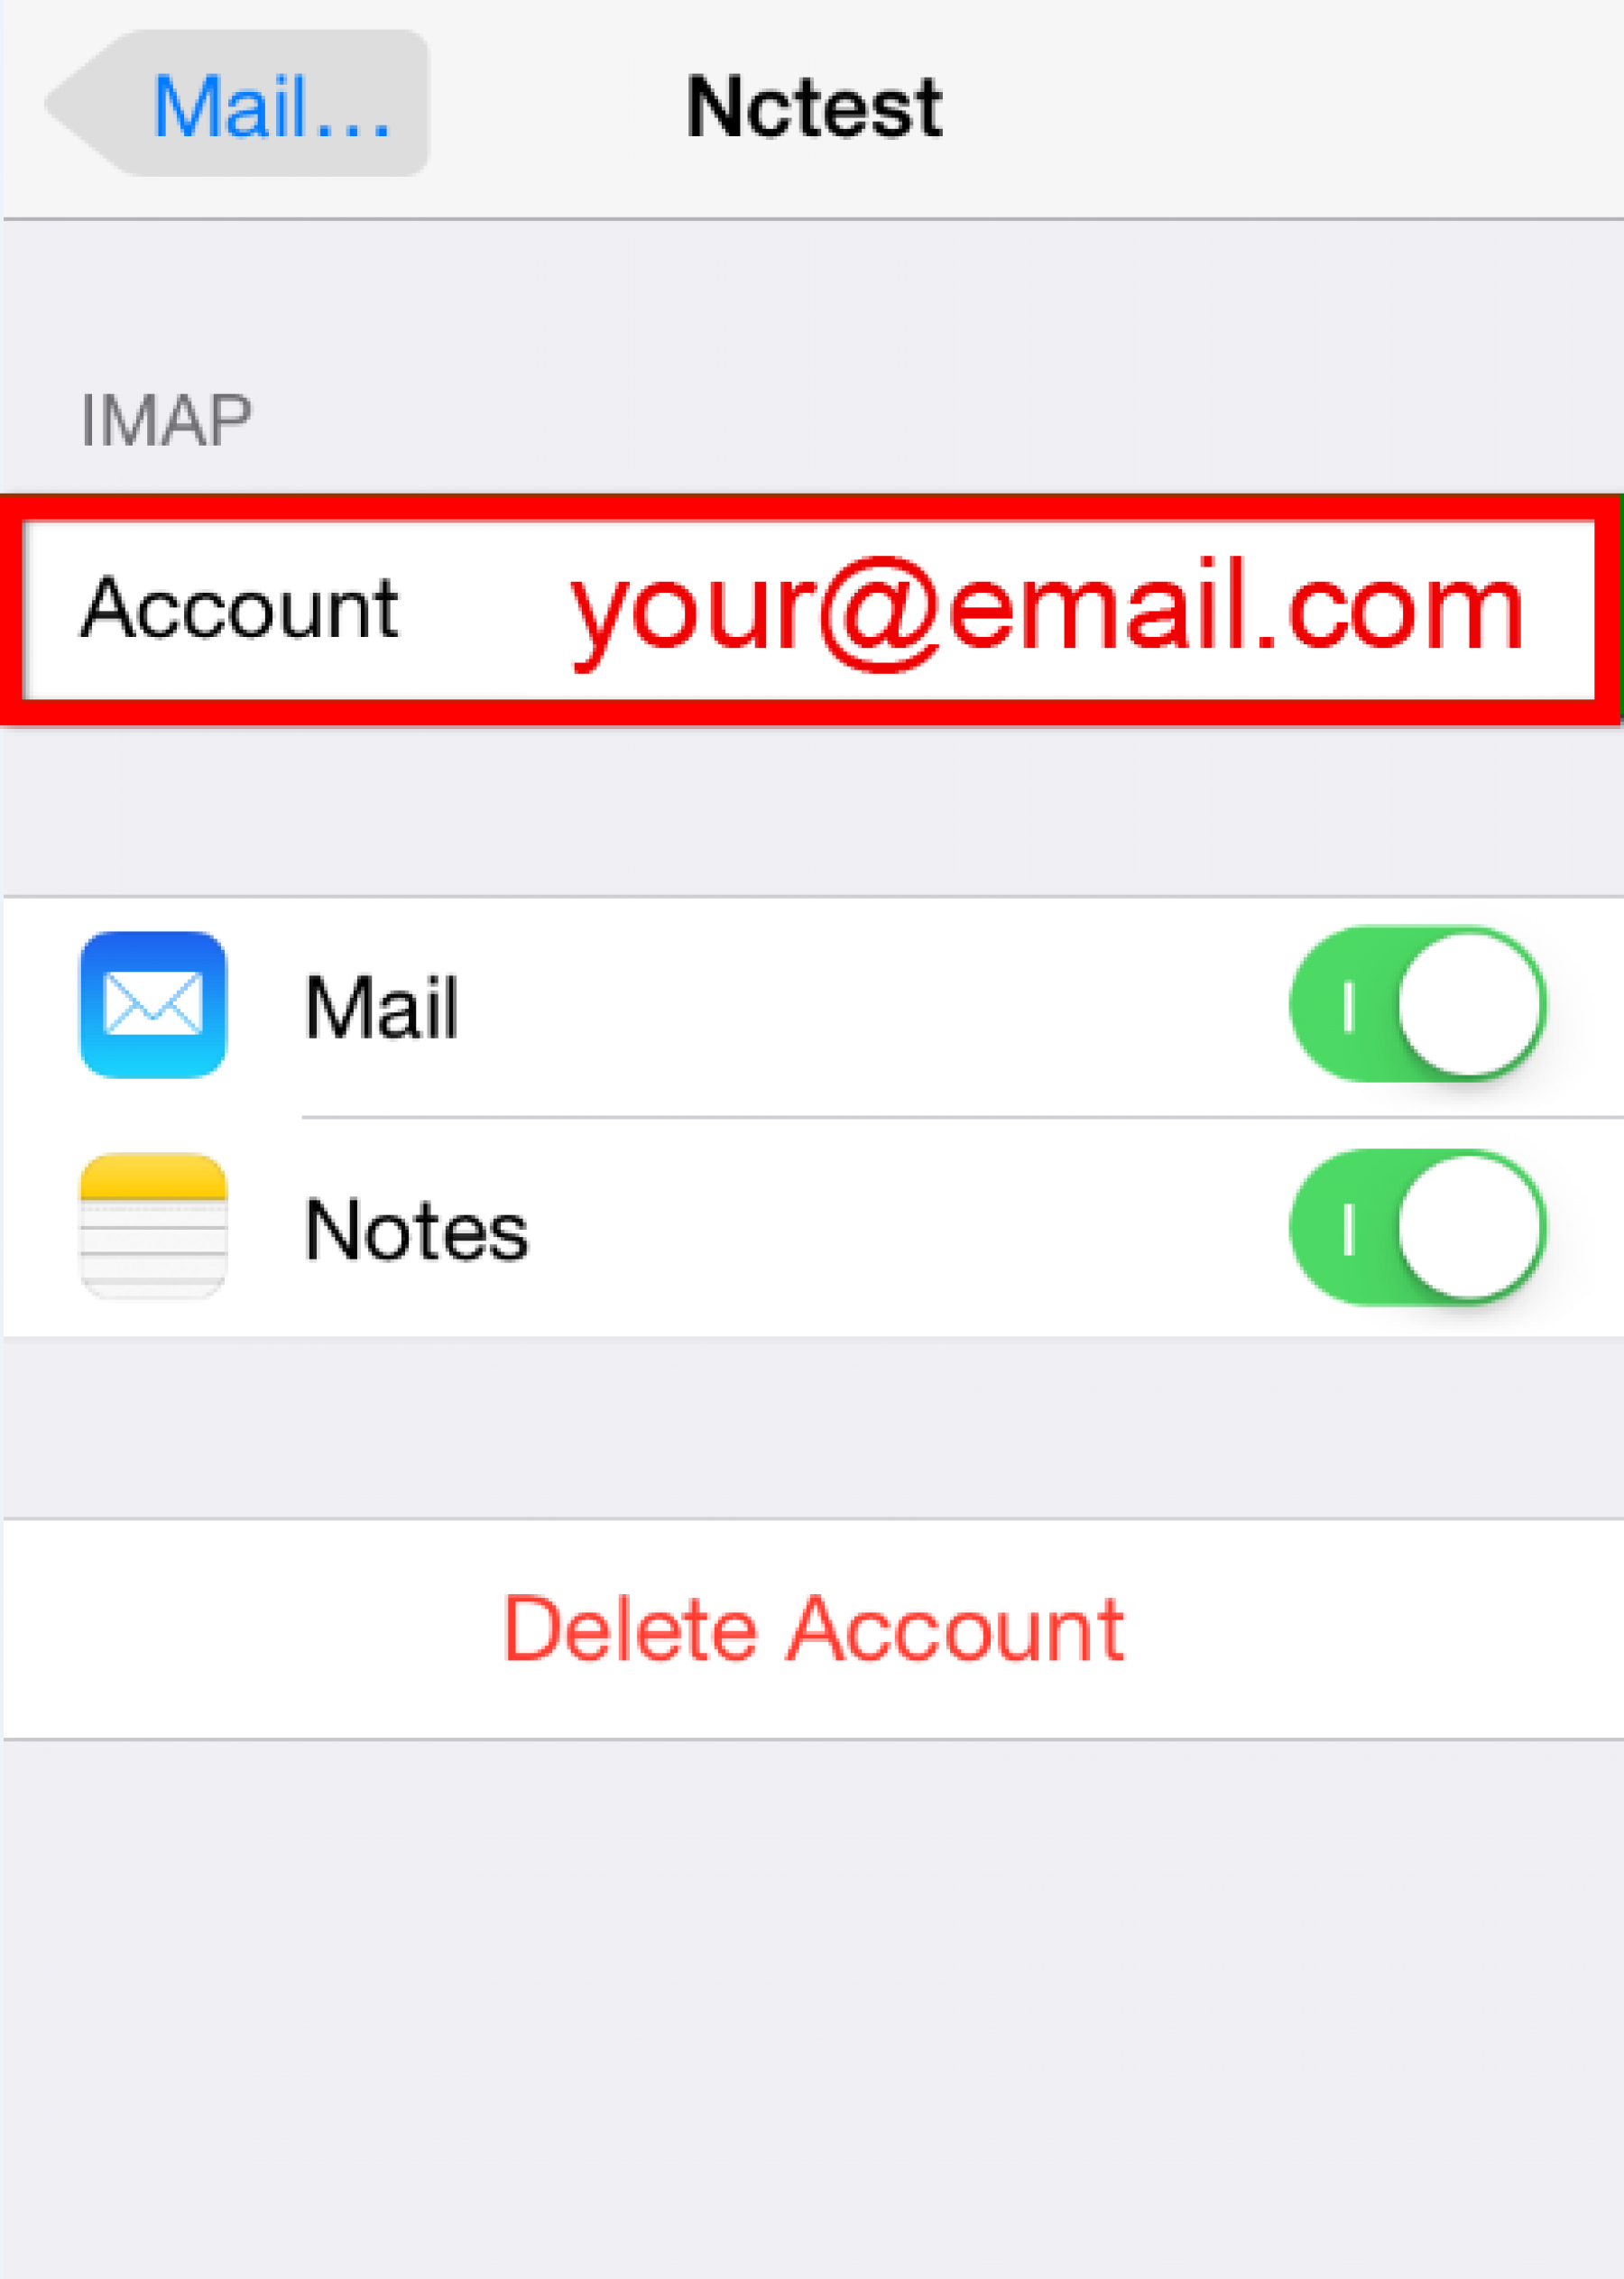
- Once saved we need to get back and specify security settings. Go back to accounts and select the newly added account.
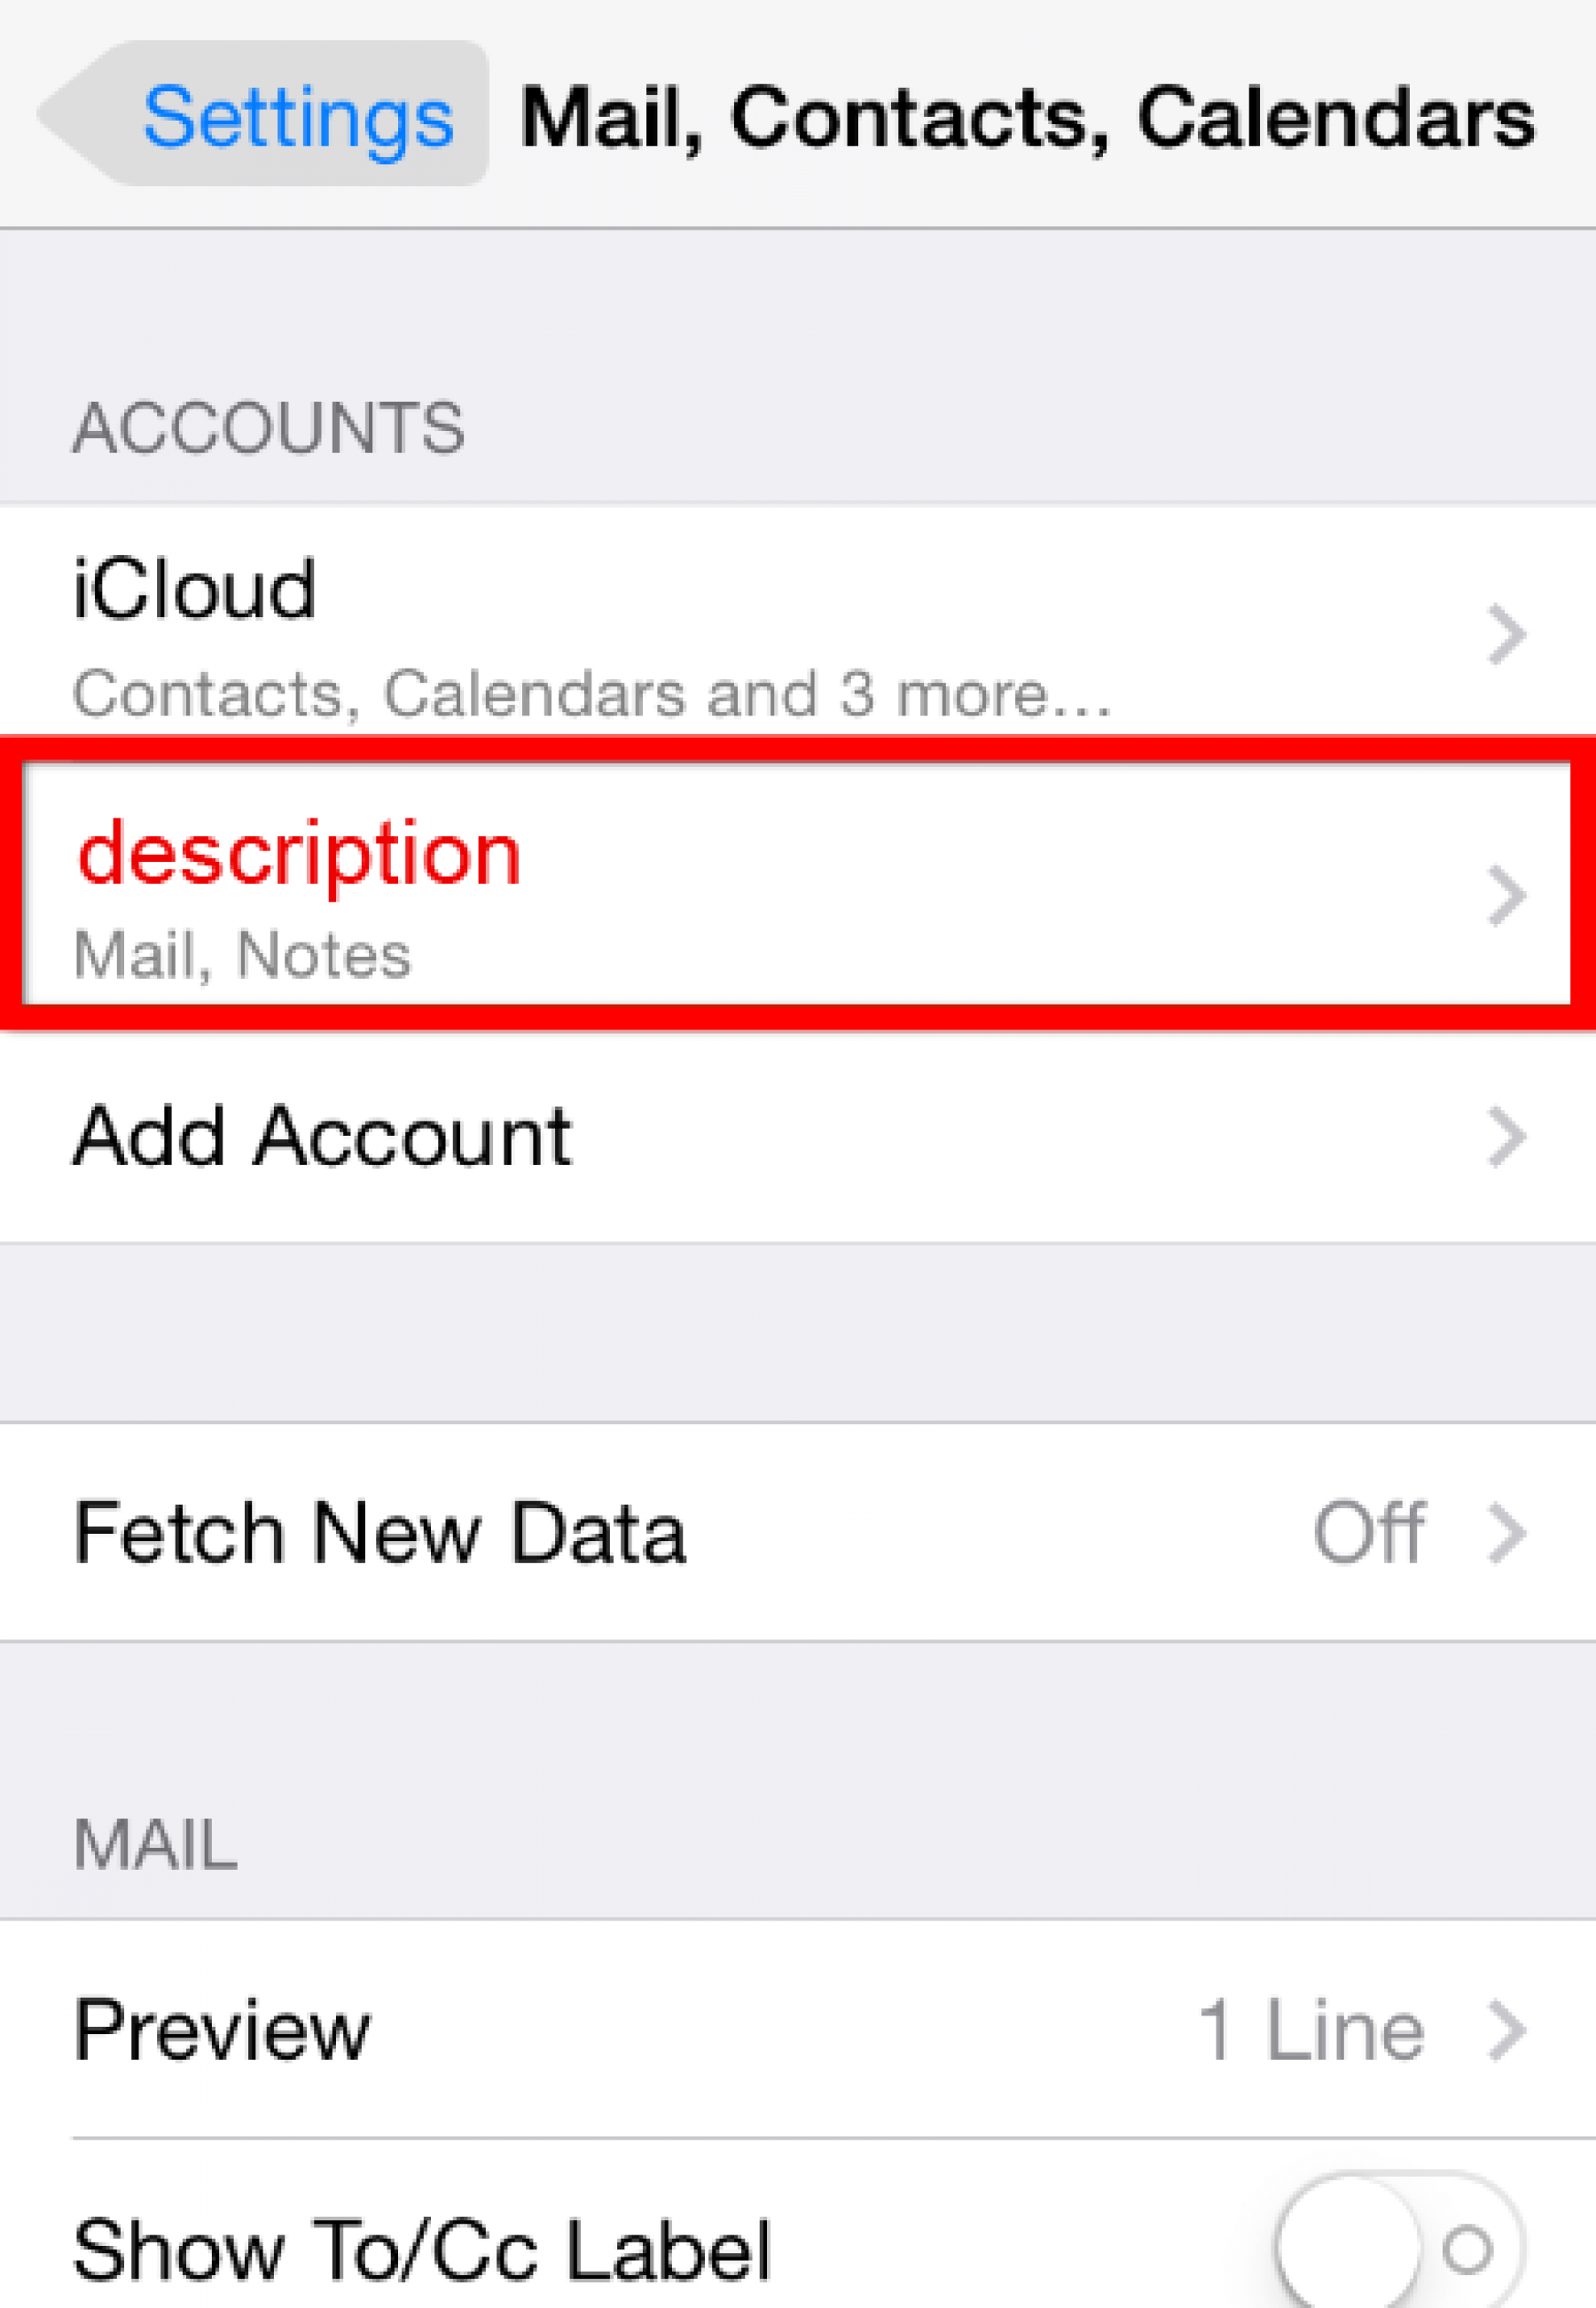
- Select the account
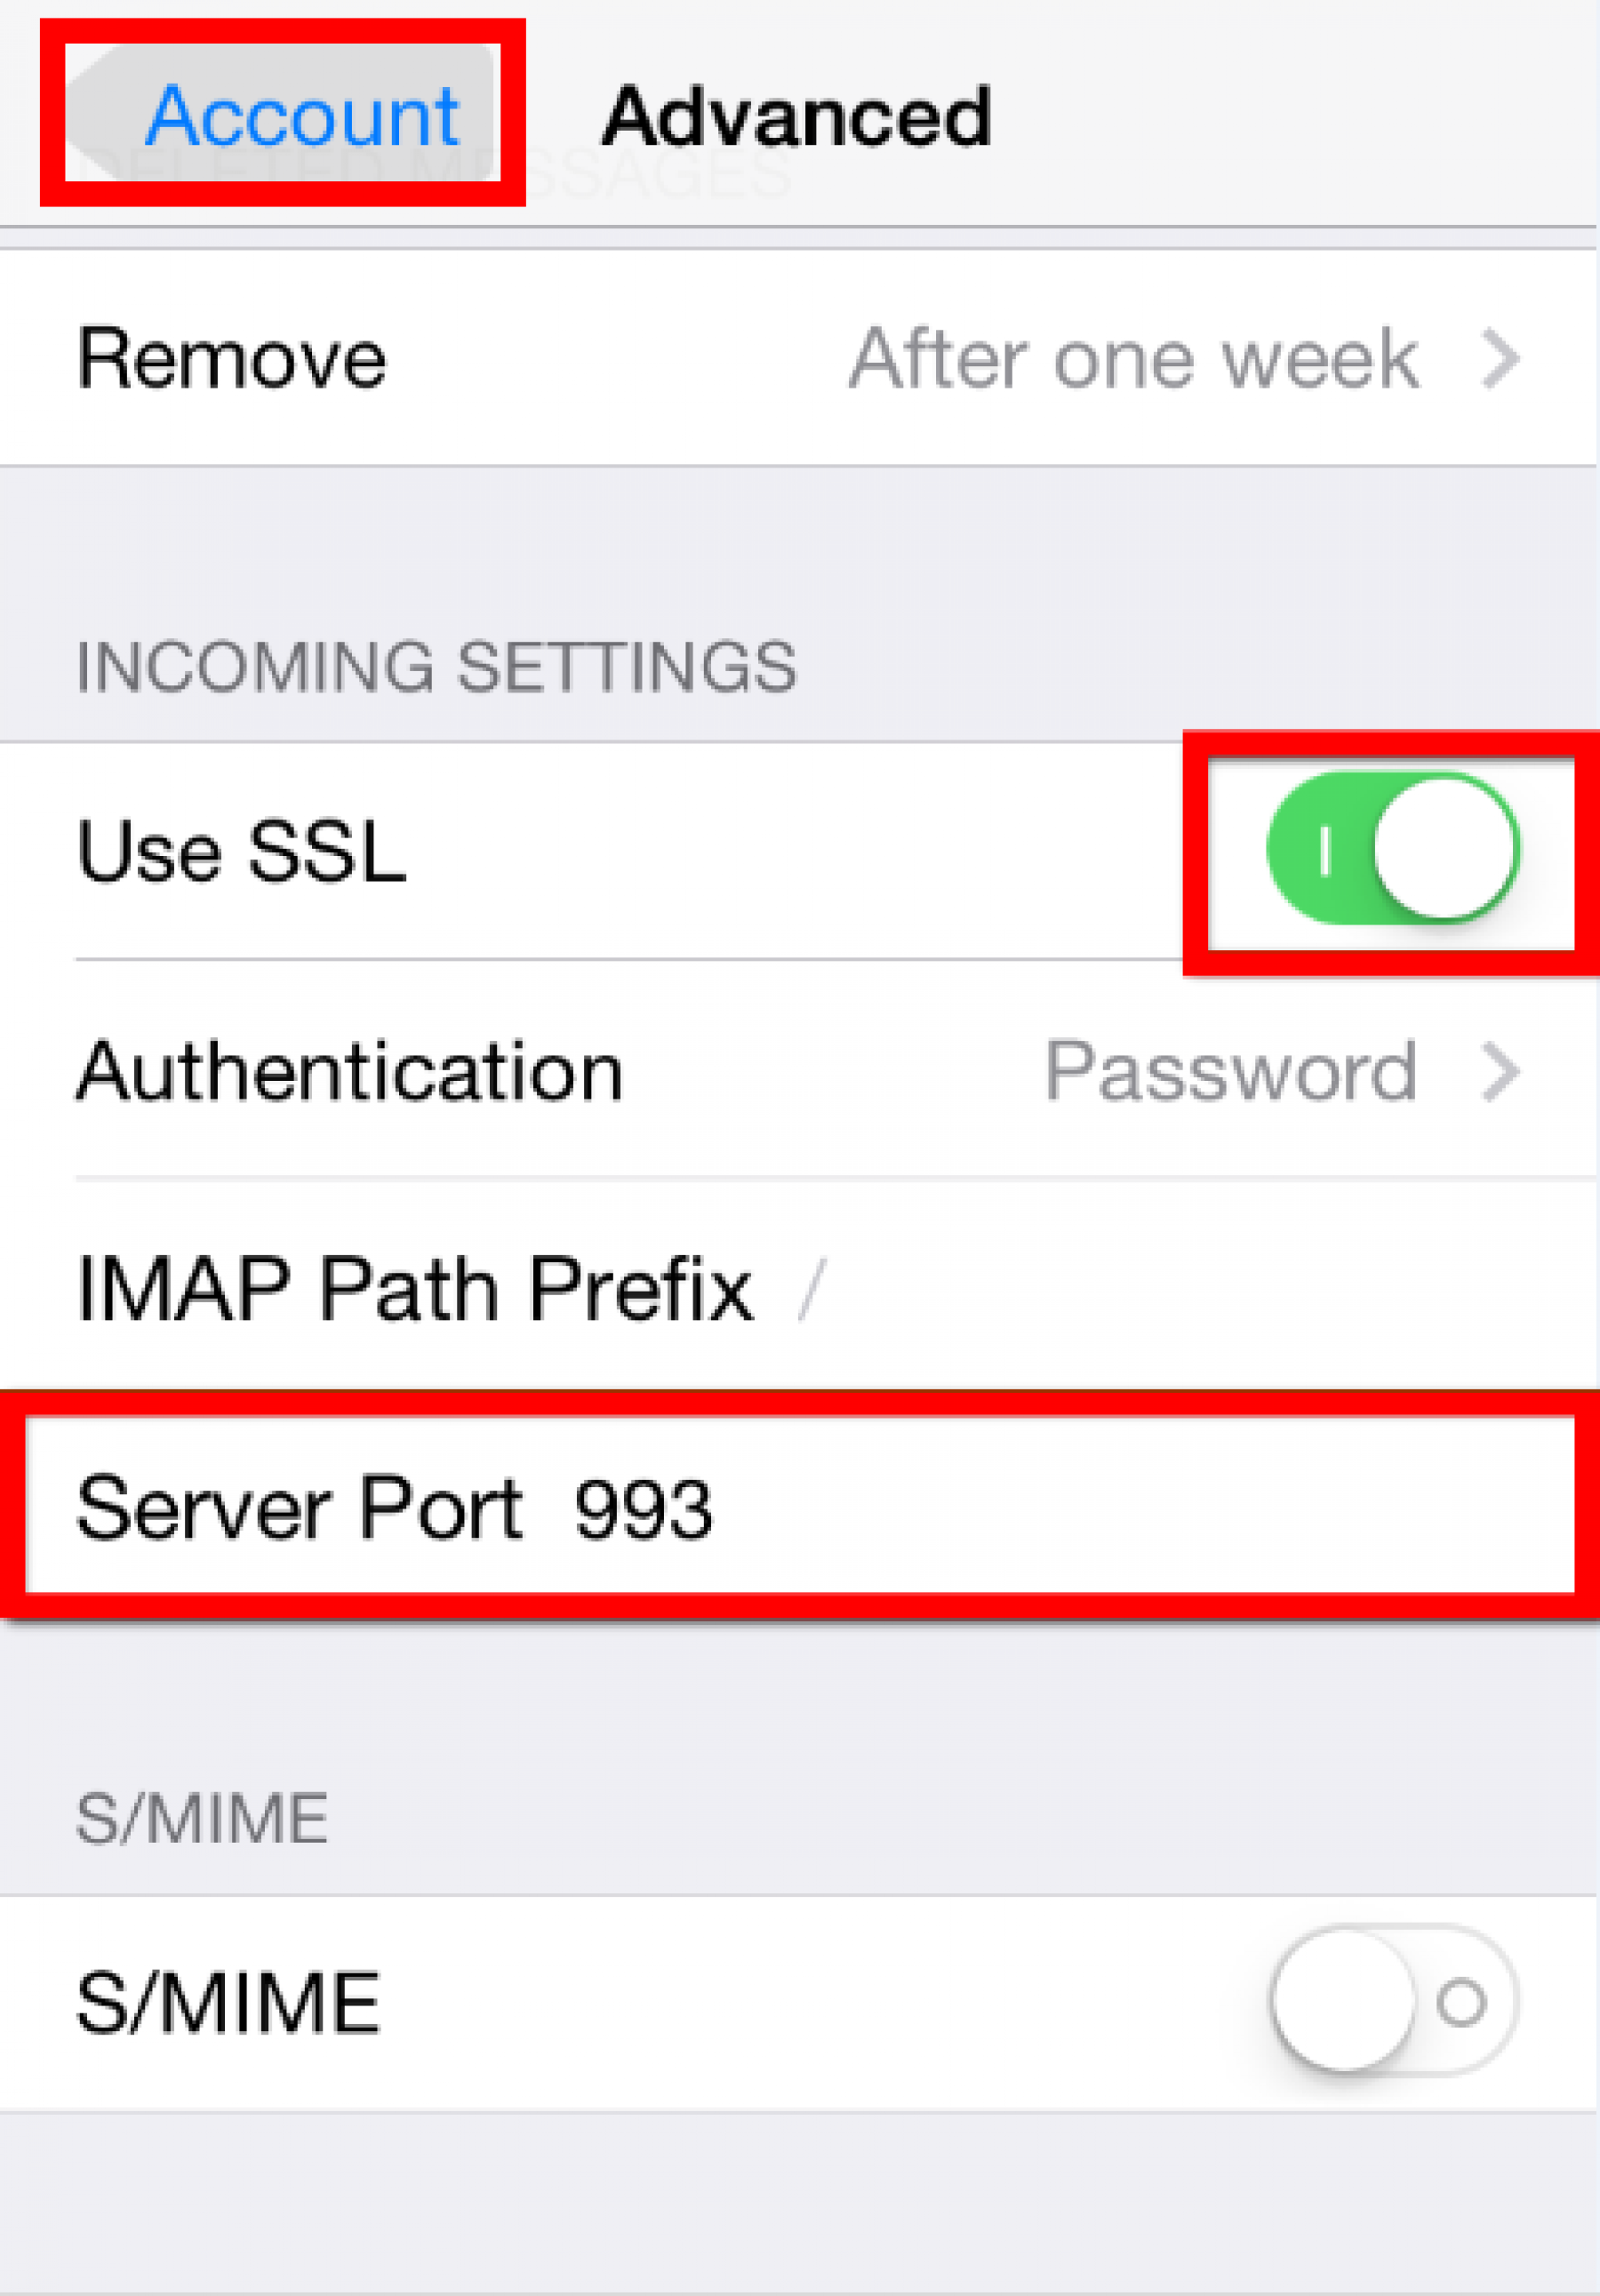
- Go all the way down and select Advanced.

- These are the incoming mail settings, turn on SSL if required and select the right port, most secure mail servers will use SSL on and port 993 for IMAP, 995 for POP. Click back to Account, if you made a mistake the iPhone will load for a very long time, be patient and try again, make sure to add the right information.
- We are back on the account section, now select SMTP
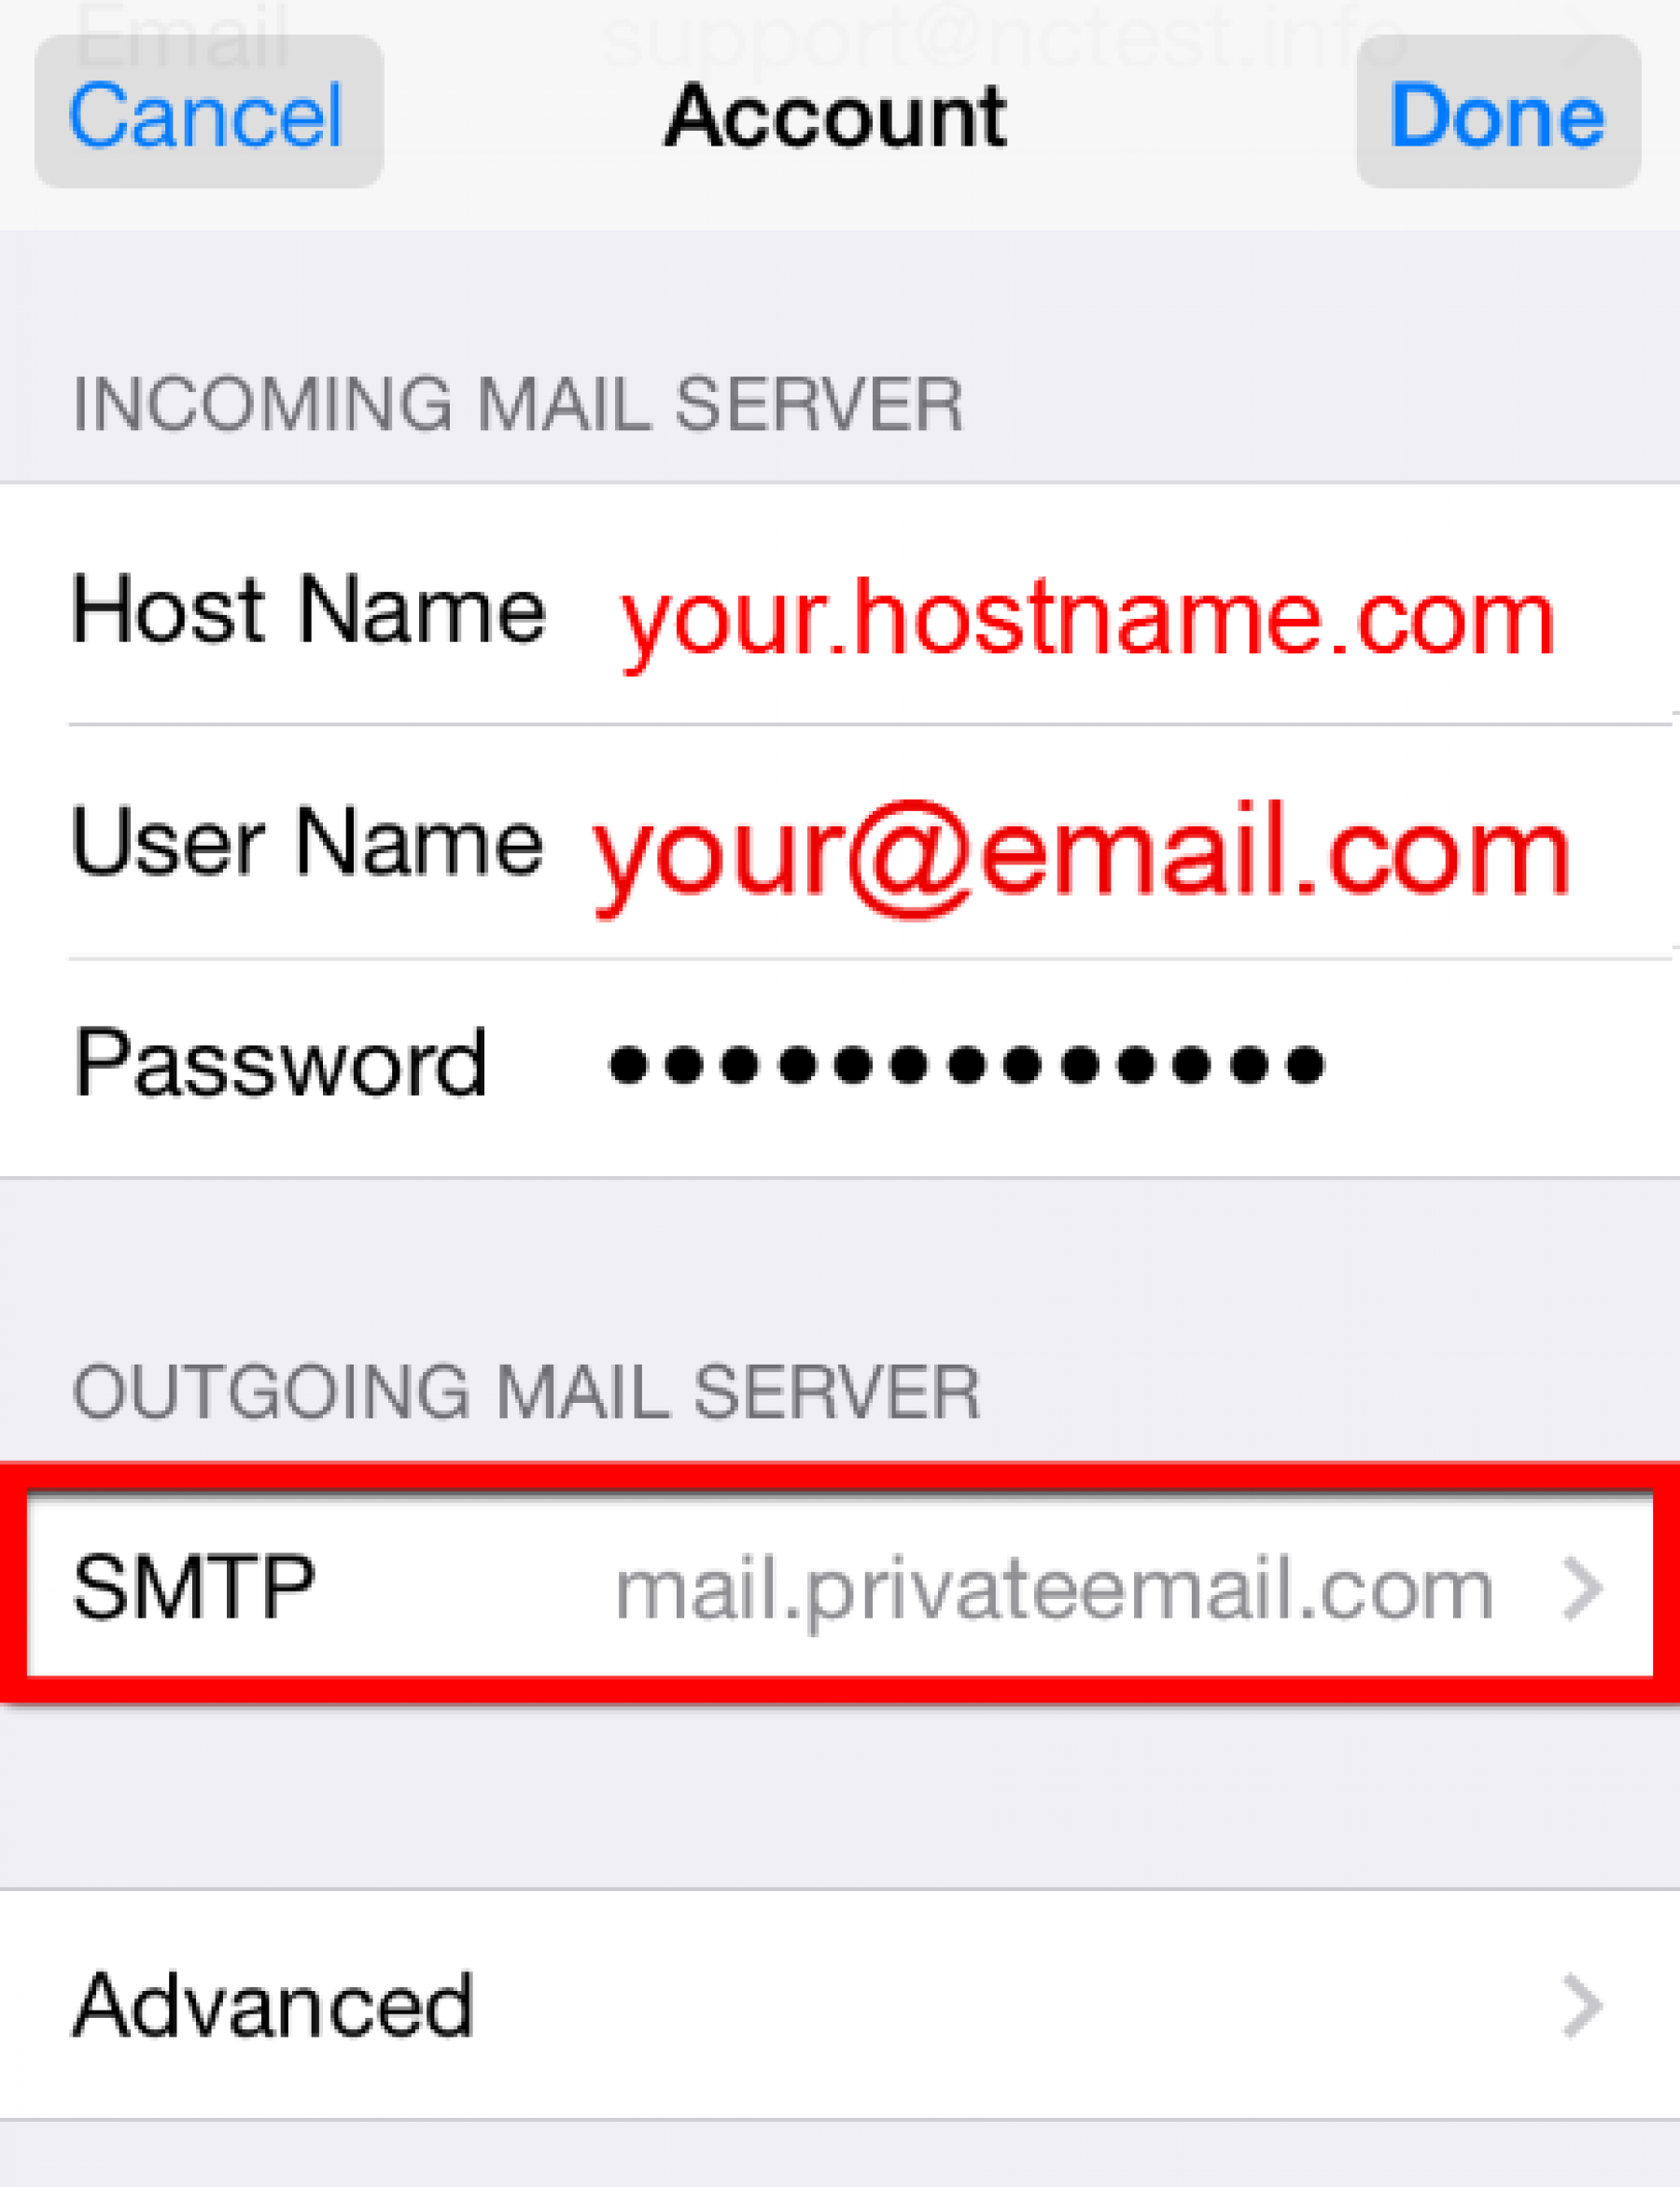
- These are the outgoing mail settings, turn on SSL if required and select the right port, most secure mail servers will use SSL on and port 465. Click Done, if you made a mistake the iPhone will load for a very long time, be patient and try again, make sure to add the right information.

- And you are done, if everything went fine you should see green checkmarks everywhere and get back to the accounts section. You can go now to your mail app and find the email account listed there.

Comments